Platform Cloud Handson 2017
Resources
Platform Presentation, https://whizzky.github.io/Platform/Presentation_PlatformCloudAcademies.pdf
Trailblazer's Guide to Apps, https://www.salesforce.com/form/conf/app-cloud/trailblazer-guide-to-apps.jsp
Platform App Idea Guide, https://www.salesforce.com/form/conf/platform-dept-appideaguide.jsp
Building a small Business App in Salesforce
To get an introduction in the possibilities of the salesforce Platform for building custom functionality we'll go through building a simple app to manage a lemonade stand business. No code required.
The project is taken from our inetractive learning environment called Trailhead.
Getting ready
We will be doing all our work in the browser and for compatibility using Firefox or Chrome is mandatory.
Before starting with the project be sure to Login (https://trailhead.salesforce.com) to Trailhead or Sign Up if you don't already have a Salesforce account. Sign with
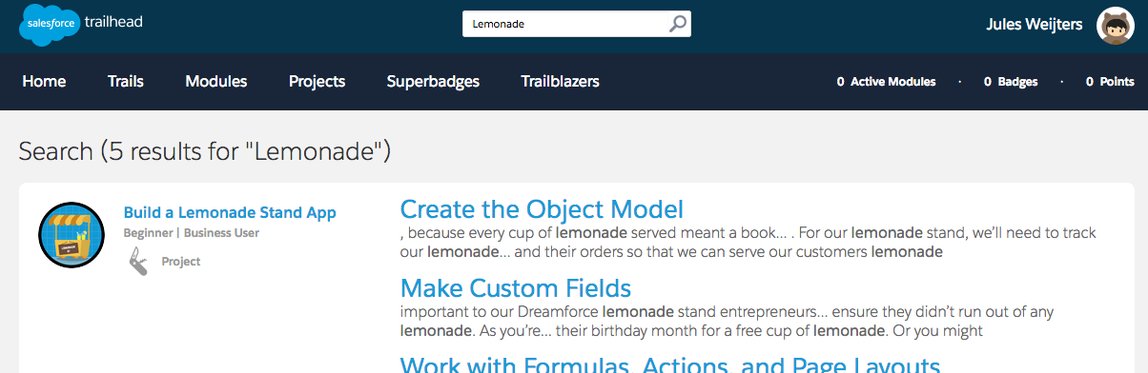
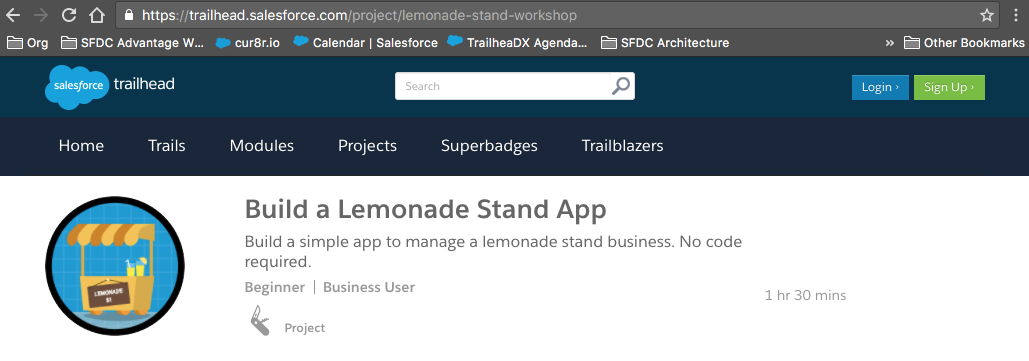
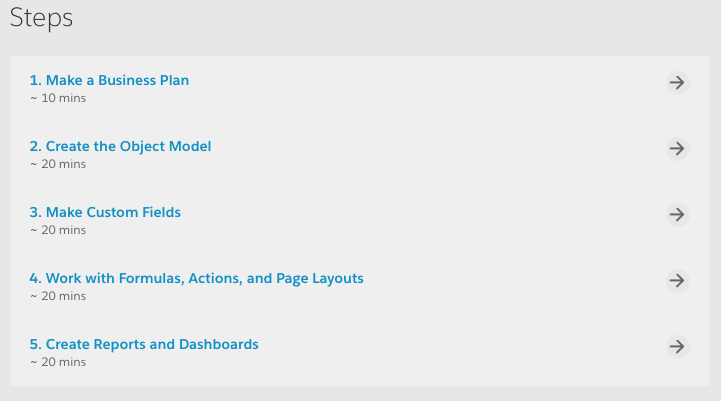
The first step of our project to Build a Lemonade Stand App (https://trailhead.salesforce.com/project/lemonade-stand-workshopis) is to get familiar with your Trailhead Playground.
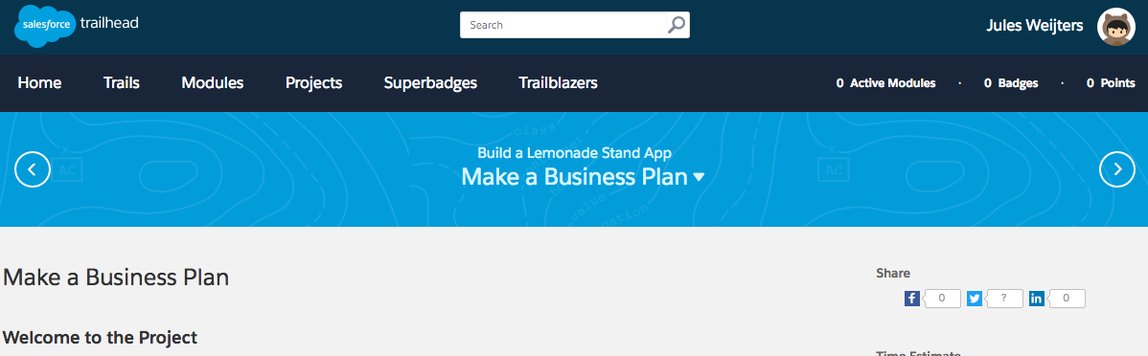
- In Trailhead find 'Build a Lemonade Stand App' by searching for 'Lemonade' at the top of the page. Click on the link 'Make a Business Plan' (https://trailhead.salesforce.com/project/lemonade-stand-workshop/make-a-business-planto) to go to the first step of the project.
- Don't follow Trailhead! We won't be using a Developer Edition but use a 'Trailhead Playground'
- Scroll all the way down to the bottom of the page and click the drop-down arrow next to 'Verify Step'. If this is not visible you need to login to Trailhead.
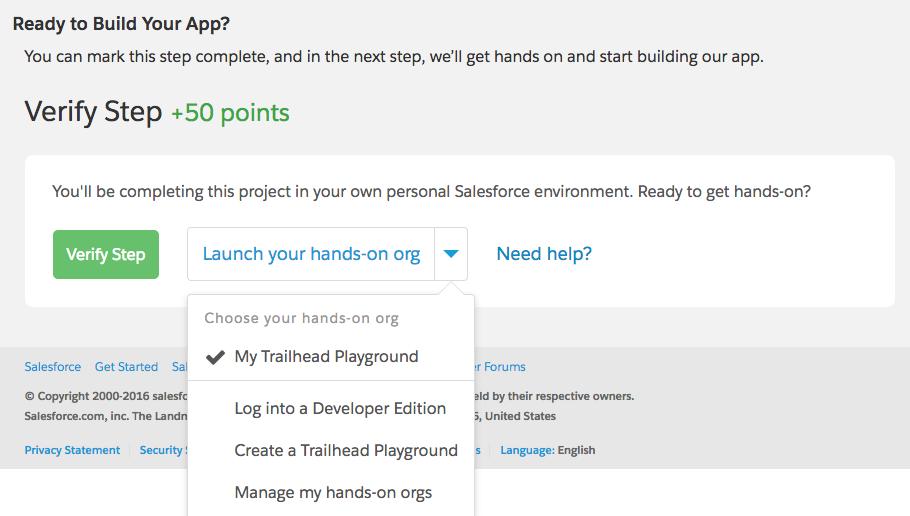
- Make sure 'My Trailhead Playground' is selected, this is the default playground environment already available for you. You can off course add an existing Developer environment (https://developer.salesforce.com/signupbut) or request other - clean - playgrounds. Click 'Launch your hands-on org'.
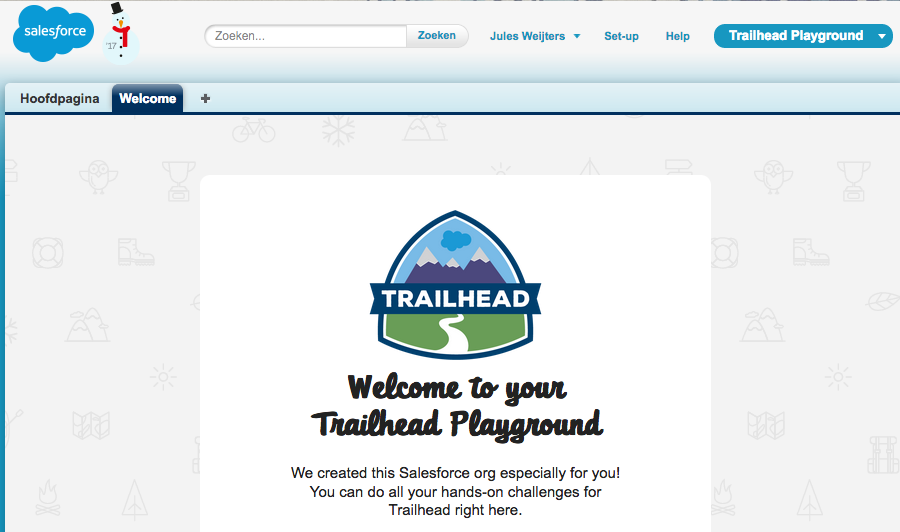
- There's no need to set your password, from Trailhead you will be logged in directly to your Org. Be aware Language is set based on the country chosen during signup.

- Since these exercises are written for English feel free to change locale to English if you prefer. Use the drop down box under your name and choose My Settings, under Personal - Language and Time Zone you can change the language to English, Save (off course it's shown in a different language). Ignore any message on critical updates.


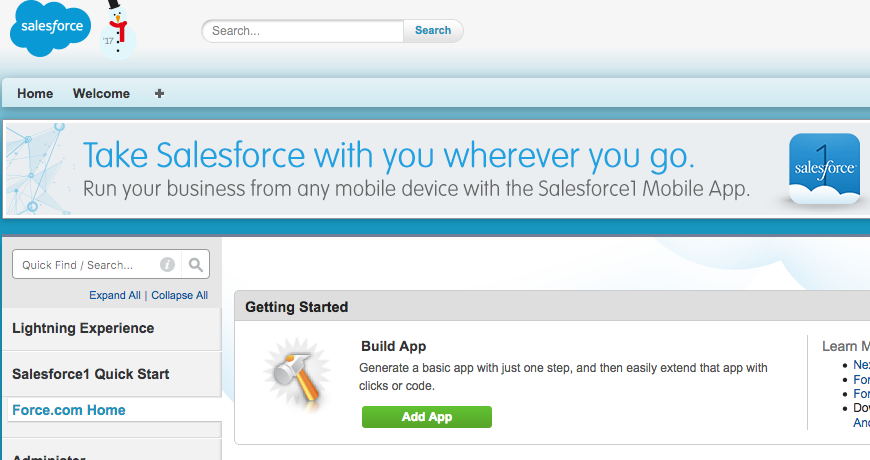
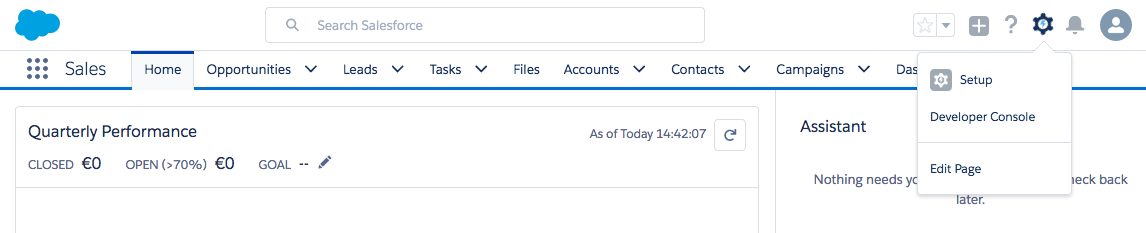
- Now we'll switch to the Lightning interface to enable the 'Lightning Experience' (https://trailhead.salesforce.com/modules/lex_migration_introduction). In the top right corner click Setup, and then from the setup tree in the top left corner click Lightning Experience.
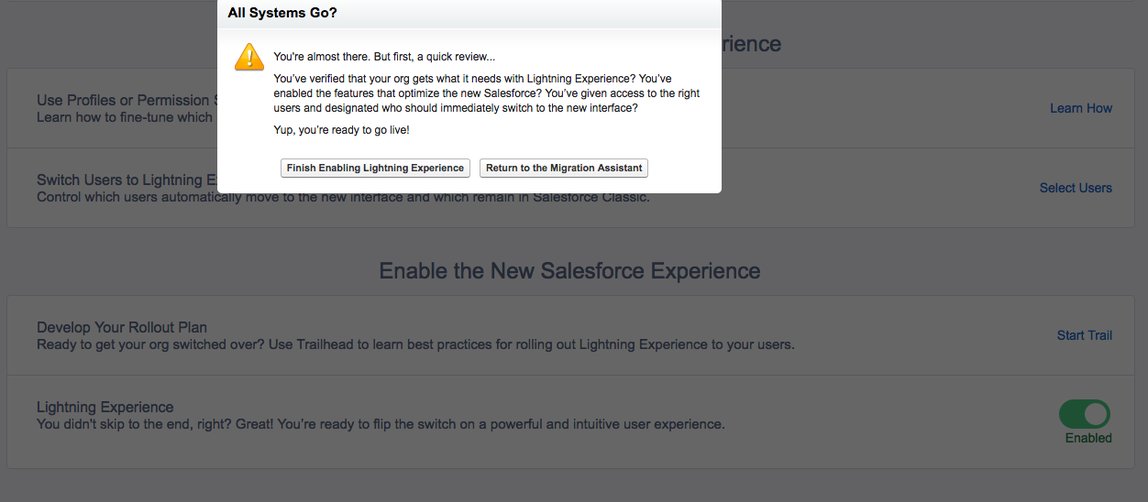
- Scroll to the bottom of the page, and next to Lightning Experience click the slider button. The slider button should update to Enabled. Click 'Finish Enabling Lightning Experience' in the dialog.
- Click your name in the top right corner. You should now see Switch to Lightning Experience in the menu. This feature is called the Switcher. It lets each user switch back and forth between Lightning Experience and the previous user experience, Salesforce Classic, on demand.

- Click 'Switch to Lightning Experience' since this handson is written to be executed in Lightning.
Your first project
Now we can start our first Trailhead project Build a Lemonade Stand App to quickly get an understanding of the meaning of 'No Code'.
- Got to https://trailhead.salesforce.com/project/lemonade-stand-workshop in a new tab in your browser and login to Trailhead if necessary. Or just go back to the already open tab if you come from the previous part.
- Click on the first step 'Make a Business Plan'
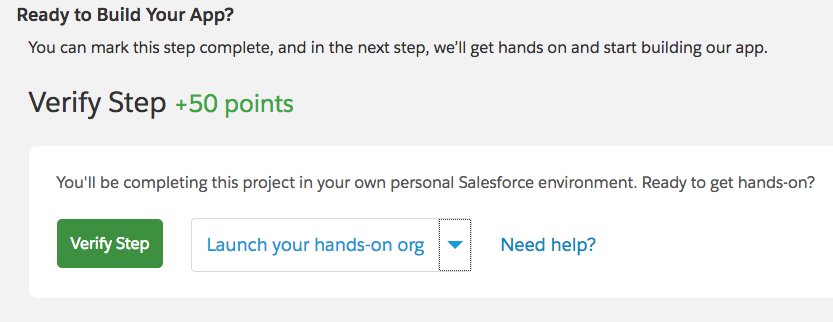
- You can read through the first paragraphs but we already completed this Step. You should have switched to Lightning, don't switch back although mentioned in the step if you're following this guide.
- You should now be able to verify the Step so click 'Verify Step' at the bottom of the page.
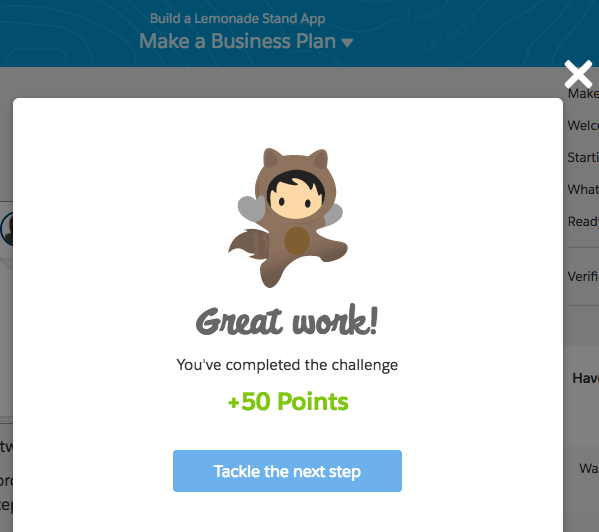
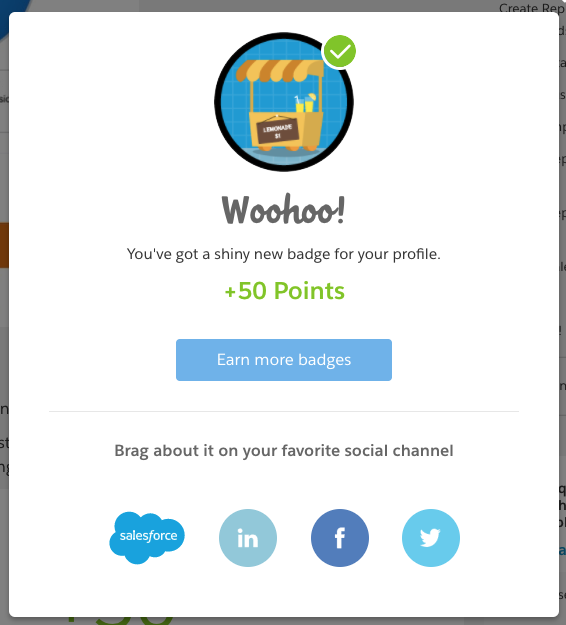
- Did Astro give you 50 points? Click 'Tackle the next step'.
Configuring our Application
Now we should be at the next step 'Create the Object Model'!
Salesforce has 3 releases each year and in the current releases we're building out our Lightning Experience. For this lab it means you can just follow Trailhead to work in the Classic interface but this guide is written for the Lightning interface. So for the Lightning Experience, instead of following the paragraph 'Create an App and a Custom Object' from Trailhead follow the below steps.
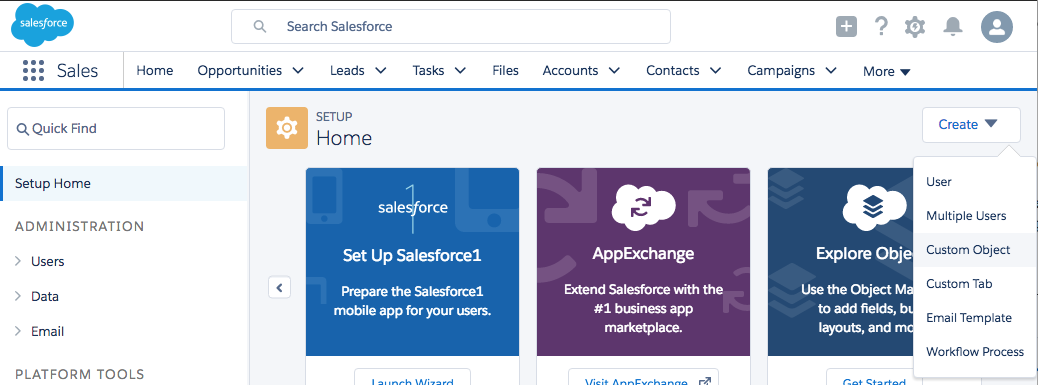
- In the top right corner, click Setup
- Choose Custom Object under Create which opens the 'Object Manager' under the section 'Objects and Fields'
- Fill in the form with
- Label: Flavor
- Plural Label: Flavors
- Accept defaults for other fields
- Check Allow Reports and Allow Activities
- Check Allow Search
- All the way at the bottom check 'Launch New Custom Tab Wizard after saving this custom object'
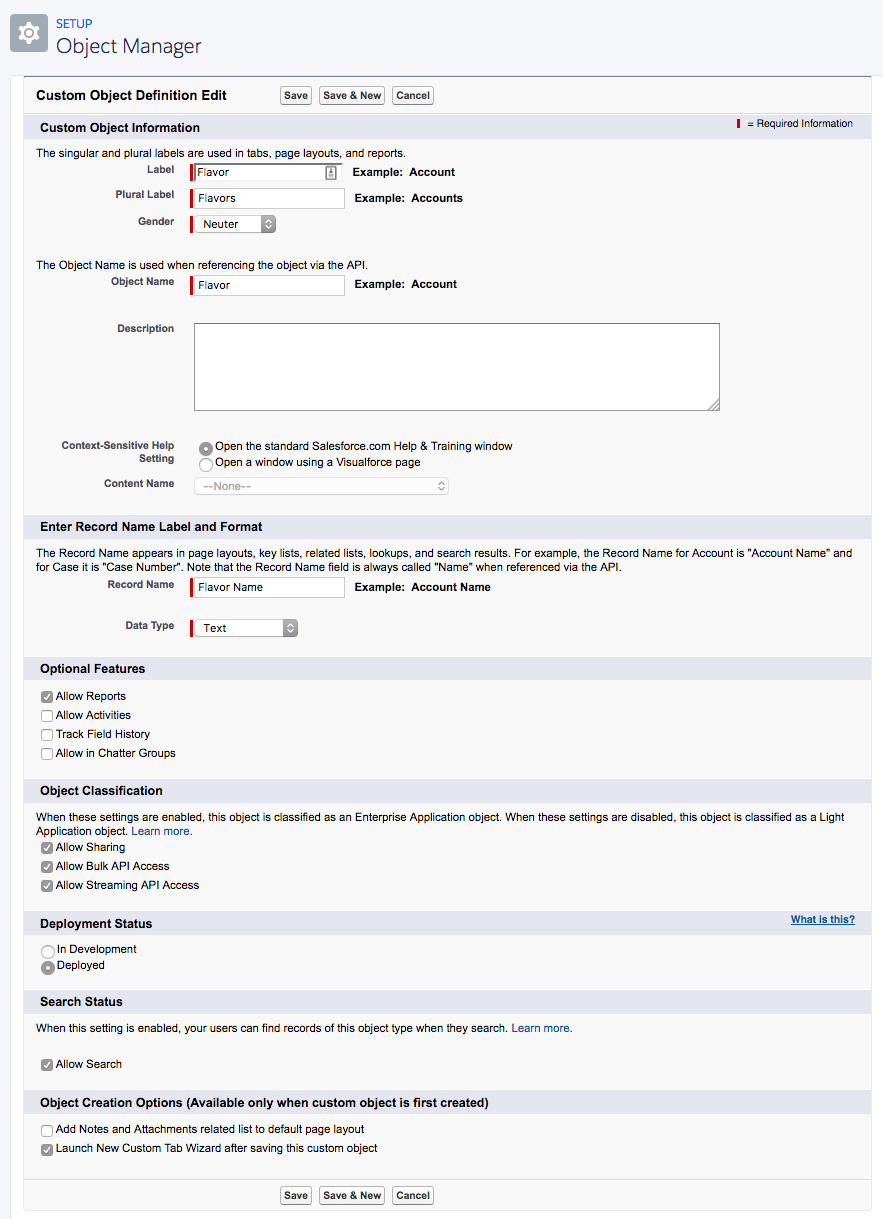
- Click Save after which you get the option to select a Tab Style
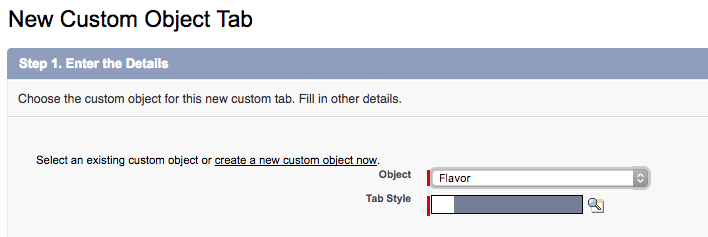
- Choose any tab style by clicking on the icon and click Next and Next
- Uncheck Include Tab and only select 'App Launcher'

- Click Save
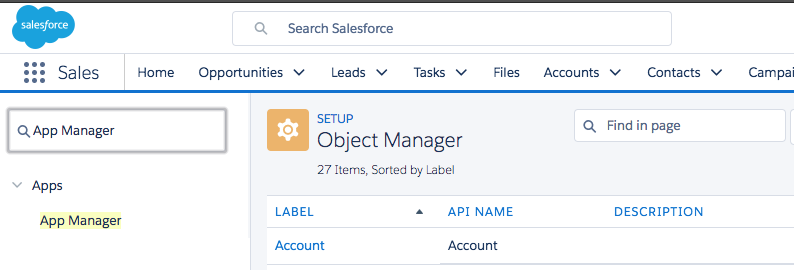
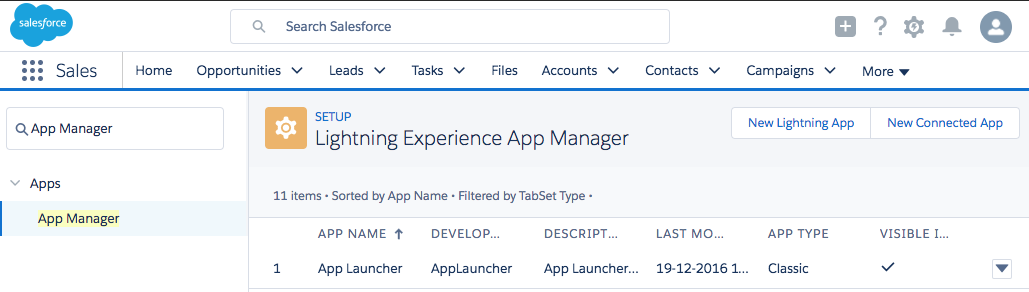
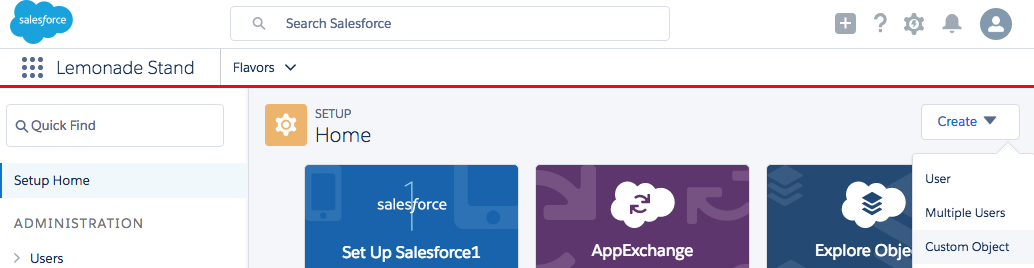
- In Setup Home use the Quick Find box (top left) to search for 'App Manager'
- Click App Manager and click New Lightning App
- Use Lemonade Stand as your App Name (relevant to follow the naming for the Trailhead verify). Pick a color, optionally add an image and click Next

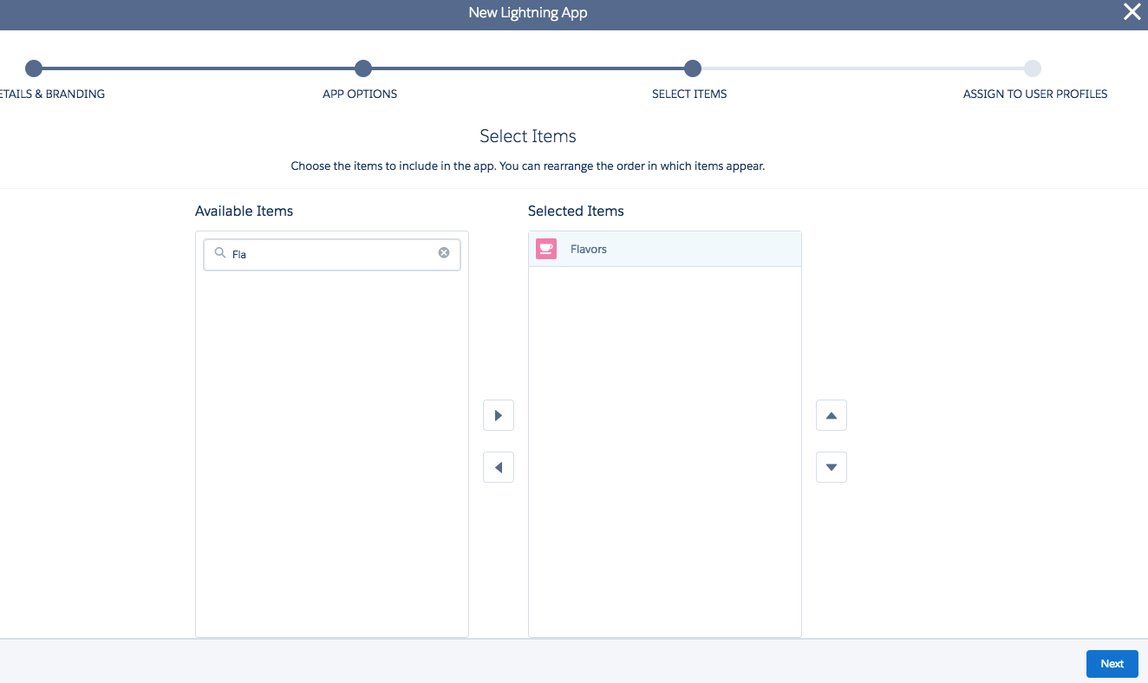
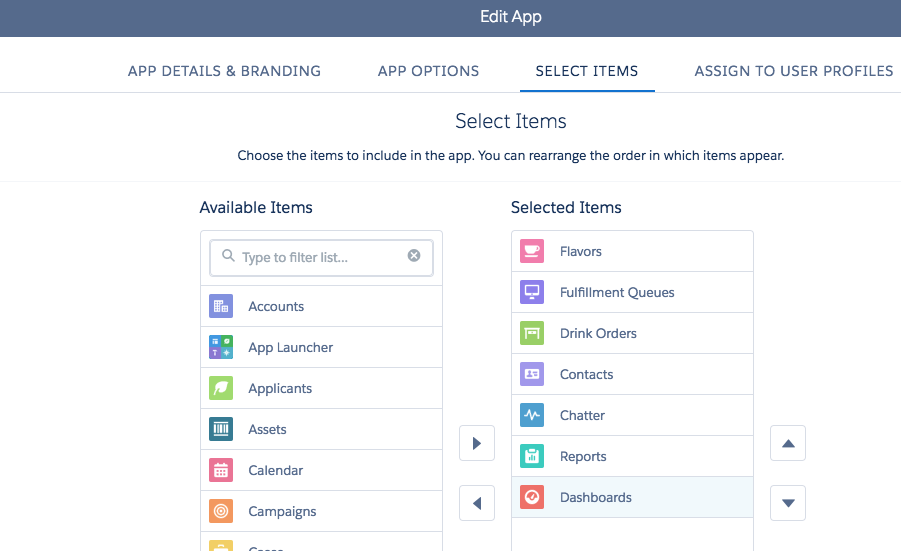
- On the 'APP OPTIONS' and 'UTILITY BAR' tab click Next and on 'SELECT ITEMS' search Flavors and move it to the left. Click Next
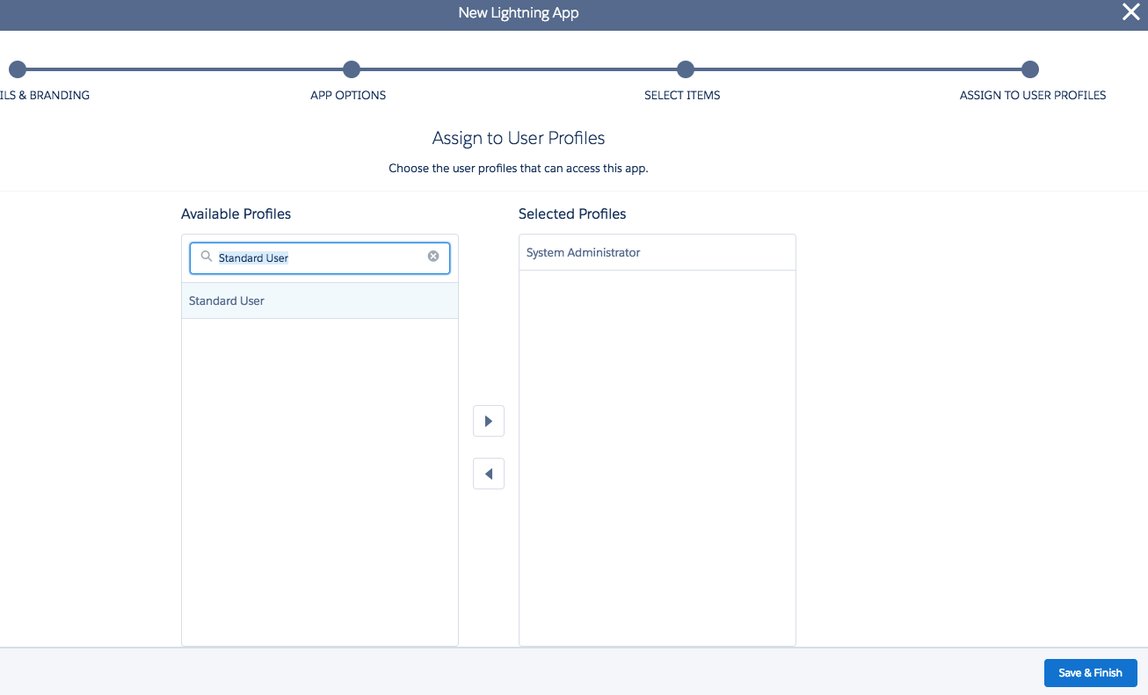
- Assign the 'System Administrator' and 'Standard User' profile to make sure you provide access to the Flavors Tab. Click Save & Finish
- Now open the App Launcher on the top left under the Salesforce logo and select Lemonade Stand
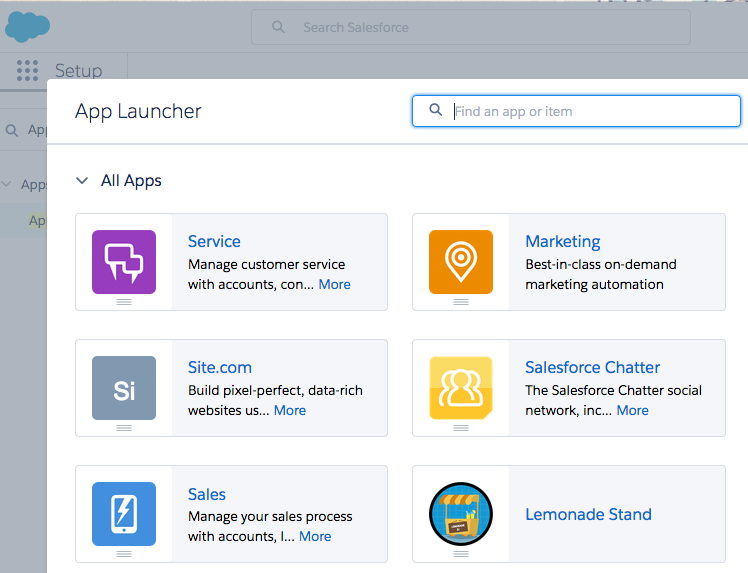
- Your basic App is created! Use the drop down box next to Flavors to add a New Flavor and see the user interface automatically created for your object

- Now go back to the Trailhead project and follow the paragraph 'Make Additional Objects'. Start creating an object again in Setup from Setup Home - Create - Custom Object or use the Quick Find box to search for 'Object Manager'. Be aware that if you pick 'Save & New' to save your custom object your browser might block a pop-up. So just click 'Save' and start from Setup Home - Create - Custom Object.

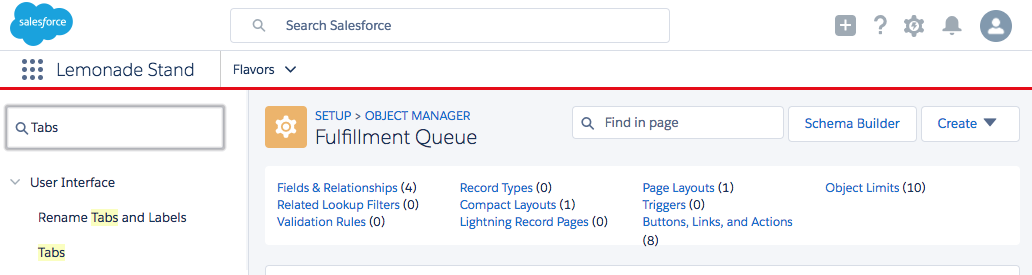
- If you created all the Object from the previous paragraph 'Make Additional Objects' follow the steps for the next paragraph 'Make Custom Tabs and Update the App' Trailhead. In Lightning you can find 'Tabs' through Quick Find or select 'Custom Tab' from the Setup Home - Create drop-down. Just create tabs for 'Drink Order' and 'Fulfillment Queue'
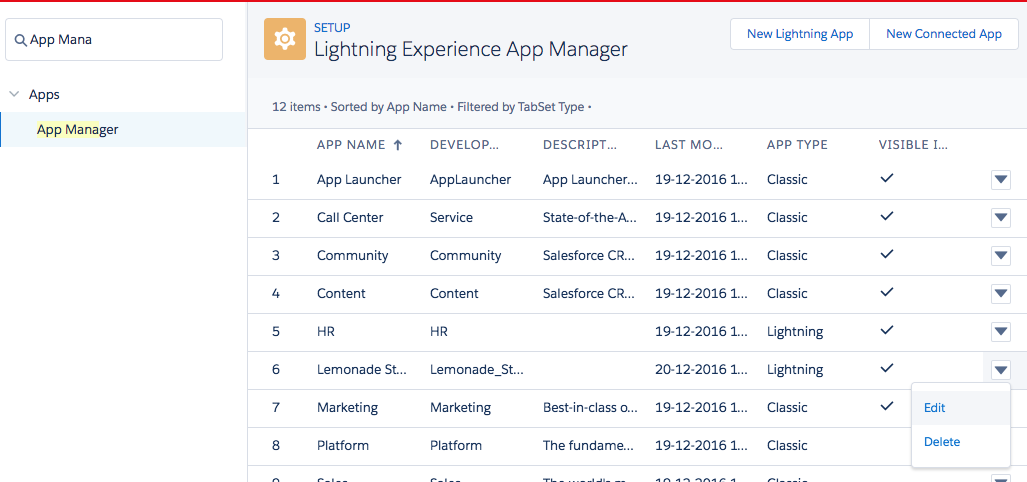
- Once you've created the Tabs for your custom objects 'Drink Order' and 'Fulfillment Queue' search again for the App Manager to find your Lemonade Stand App. use the drop down box at the end to select Edit
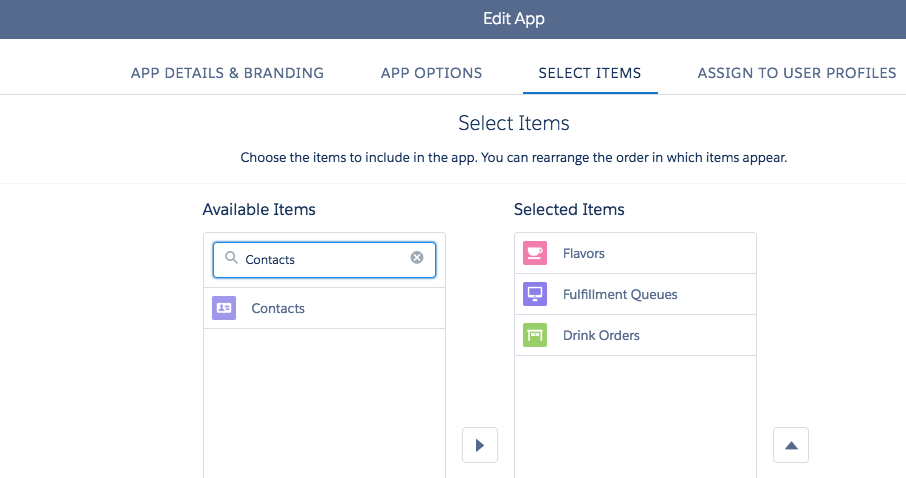
- Click SELECT ITEMS to add the existing object Contacts to your Lemonade Stand App. Also add Chatter, Reports and Dashboards. Click Save and Done
- Now reopen your Lemonade Stand App from the 'App Launcher'

- Complete the Trailhead step 'Try It Out' and when done click Verify Step
Completing the project
Impressed by how quickly you can configure an Application on the App Cloud? You'll be even more impressed to know your content is also available on the Salesforce1 mobile app (don't get confused). At the end of the project feel free to download (if necessary) Salesforce1 from the store relevant for your device and open Salesforce1 (use this article to find your Trailhead Playground credentials).
- Now follow and complete the project on Trailhead. If you can't find what's needed in Setup, try to use the Quick Find and view the tips below before completing the project.
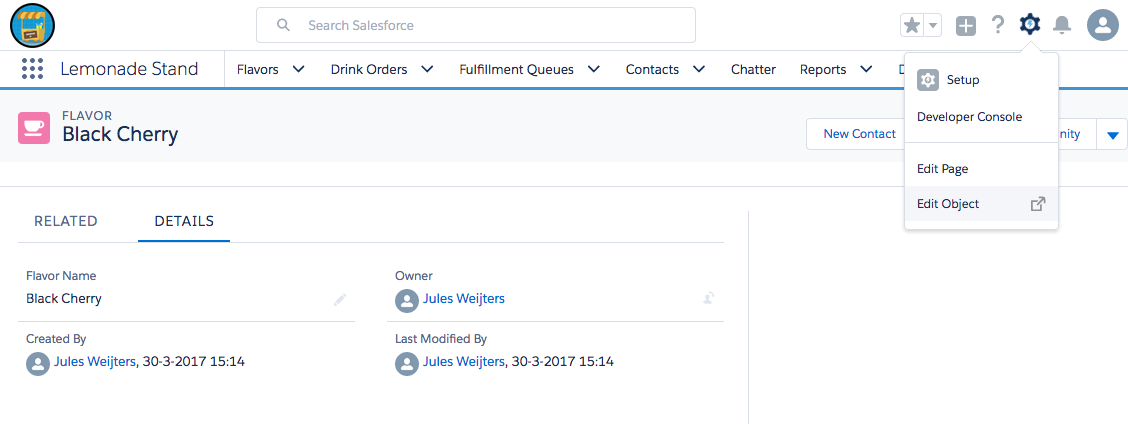
- You can find the 'Object Manager' details for an Object through the Edit Object option on the SETUP drop down (be sure to open an object first)
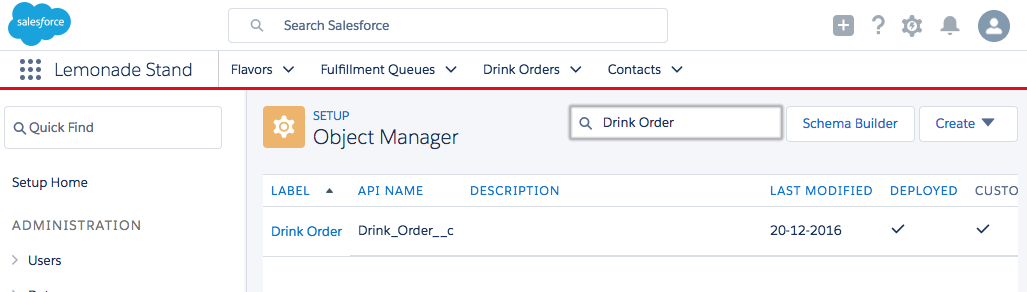
- If you're on an object details page in the 'Object Manager' use the breadcrumb to go back to the main screen by clicking OBJECT MANAGER. You now get an overview of all objects in Salesforce

- Use 'Find in page' to find your objects
- Find the section (like Fields & Relationships) through the hyperlinks at the top.
- If you get errors on your 'Lemonade Stand' app or a page cannot be viewed reload the browser page first.
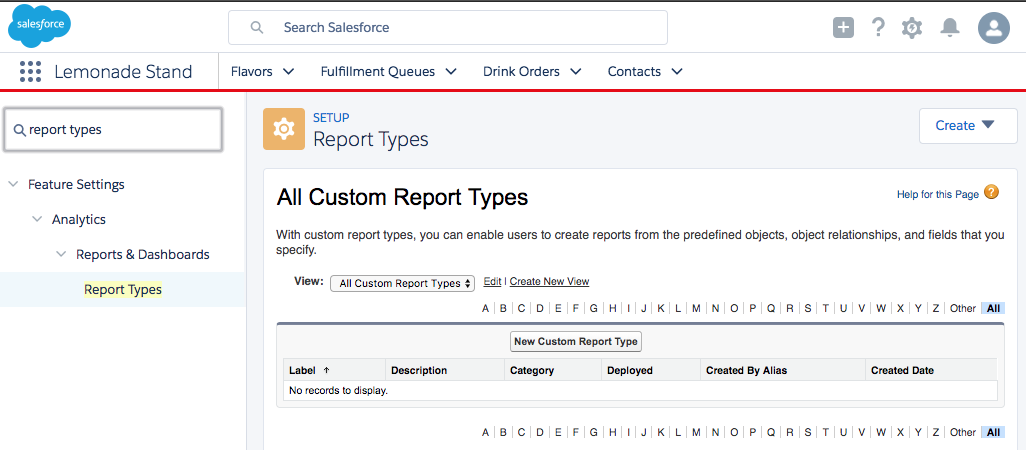
- When you're at the final Trailhead step for our Project called 'Create Reports and Dashboards' use the Quick Find in Setup again to find 'Report Types'
- Did you find your Lemonade Stand App on your mobile or in your mobile browser? No? That's correct, only the individual objects are available in Salesforce1 as well as your Reports and Dashboards.
- When all went according to plan you should have a brand new badge on your Trailhead account!
Creating mobile content
We've completed our Project and built the Lemonade Stand App! But although the individual objects are available through Salesforce1 we also want to customise content for staff to see the number of back orders.
We create our mobile apps in the 'Lightning App Builder', it helps you build custom pages for Lightning Experience and Salesforce1 quickly with point-and-click tools. You can learn more about the 'Lightning App Builder' another Module on Trailhead.
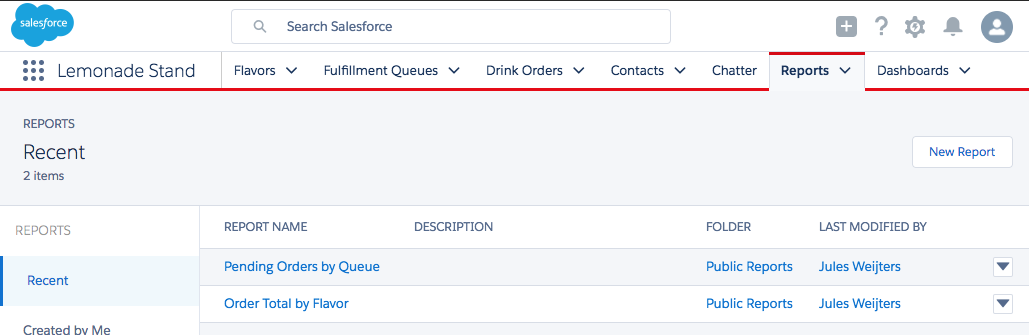
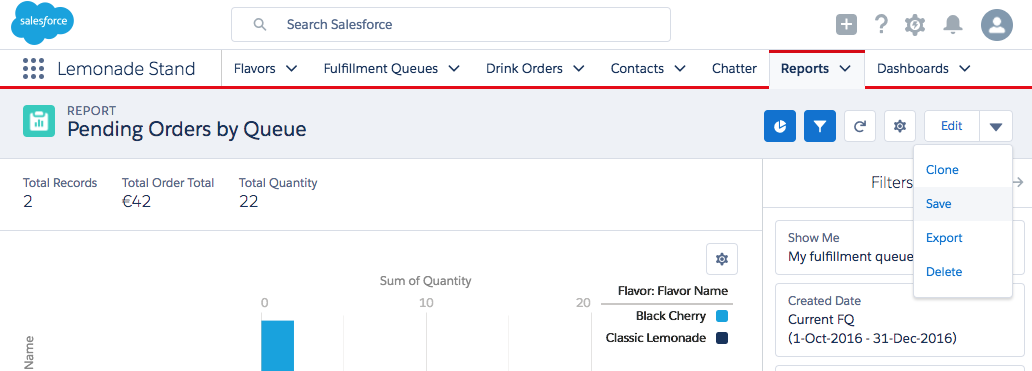
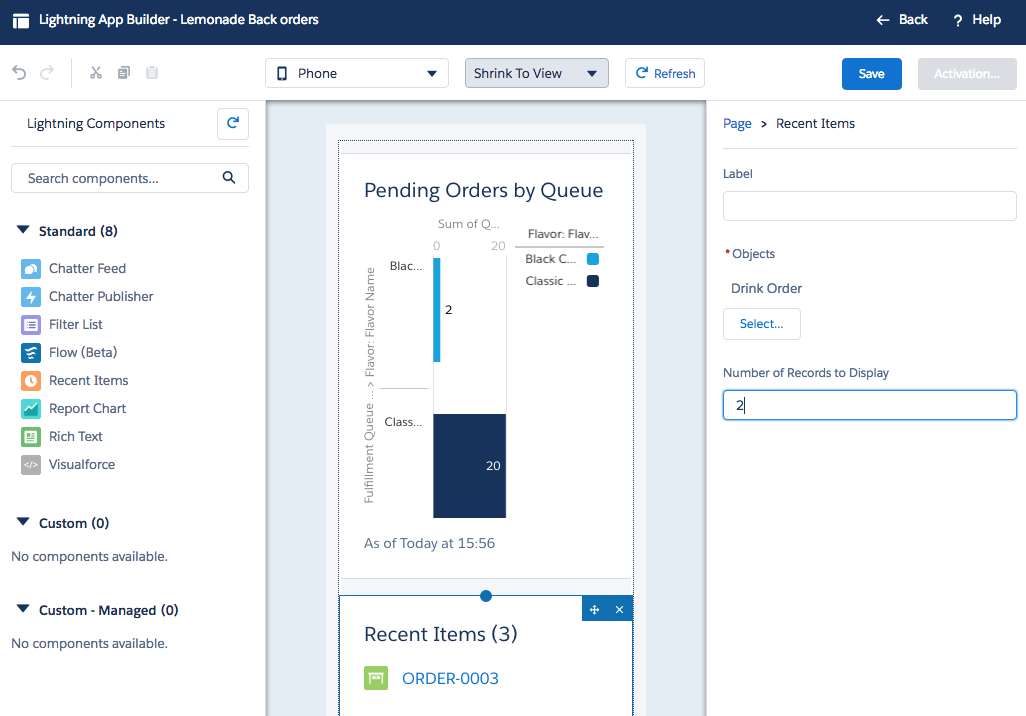
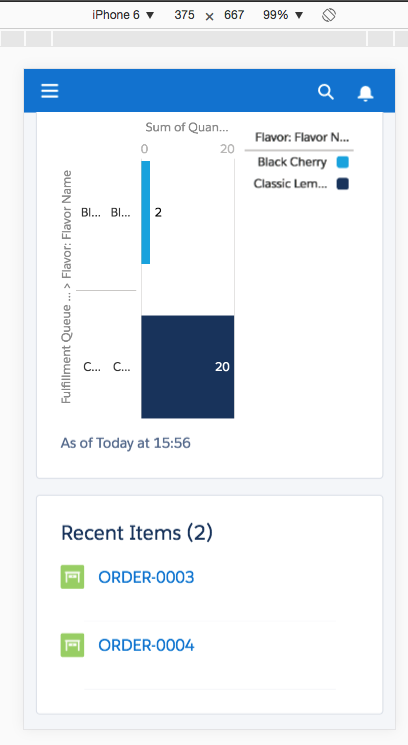
- Go to the Reports tab and click Pending Orders by Queue
- Click on the small chart icon to enable the chart

- Select the small wheel on the chart and change the chart X-axis to Sum of Quantity. Click the wheel again to see the change
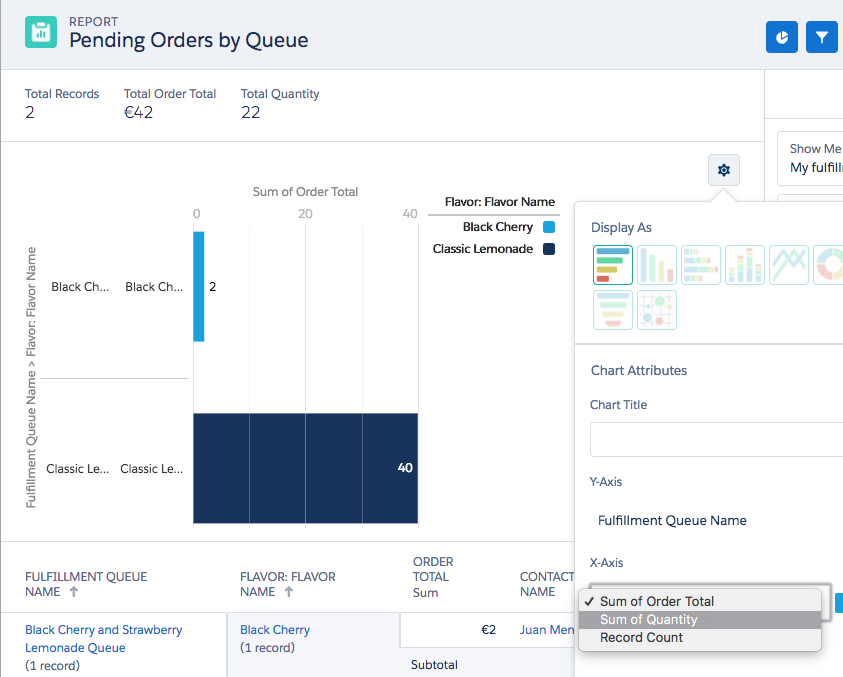
- Use the drop down box on the far right to click Save
- Navigate to Setup Home and search for 'Lightning App Builder' in the Quick Find box
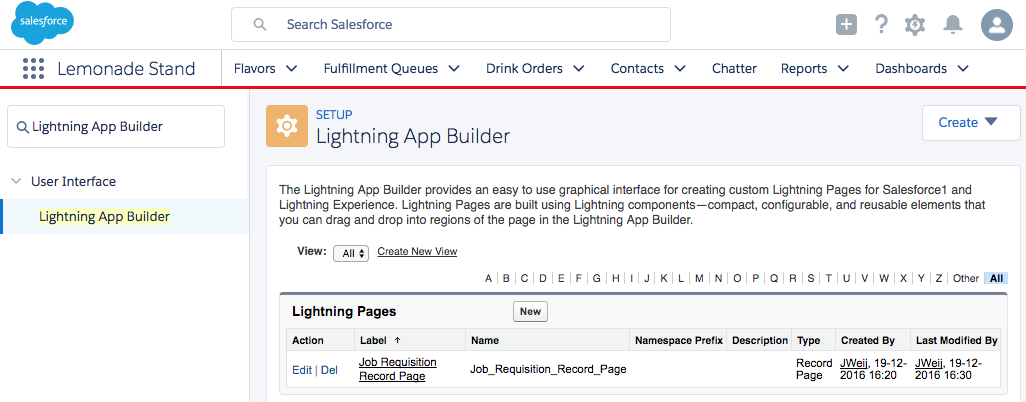
- Click Lightning App Builder and click New
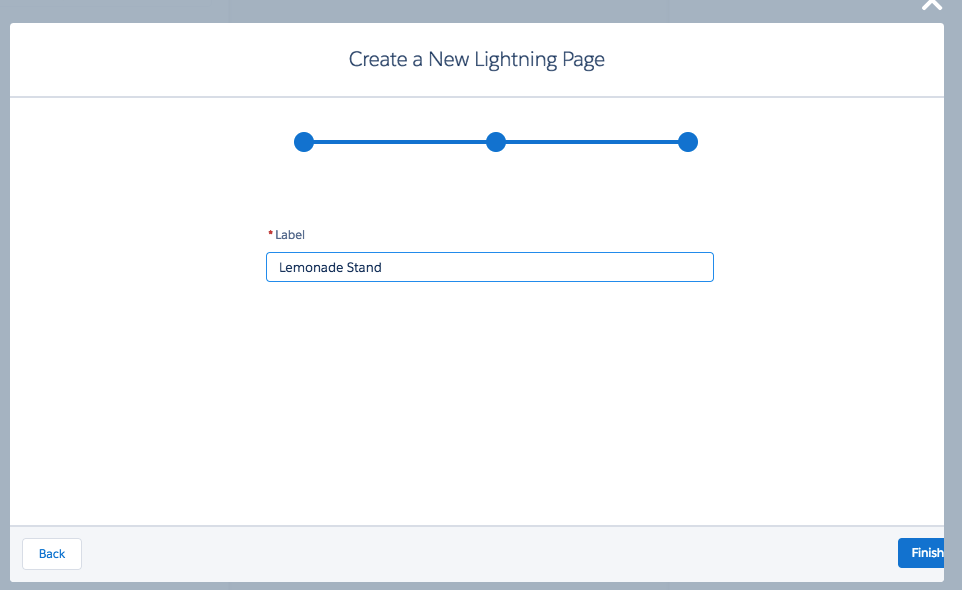
- Select 'App Page' and click Next
- Select 'One Column' (scroll down) and click Next

- Give your page a name and click Finish
- Drag the 'Report Chart' component onto the page, it will automatically pick the chart from our report
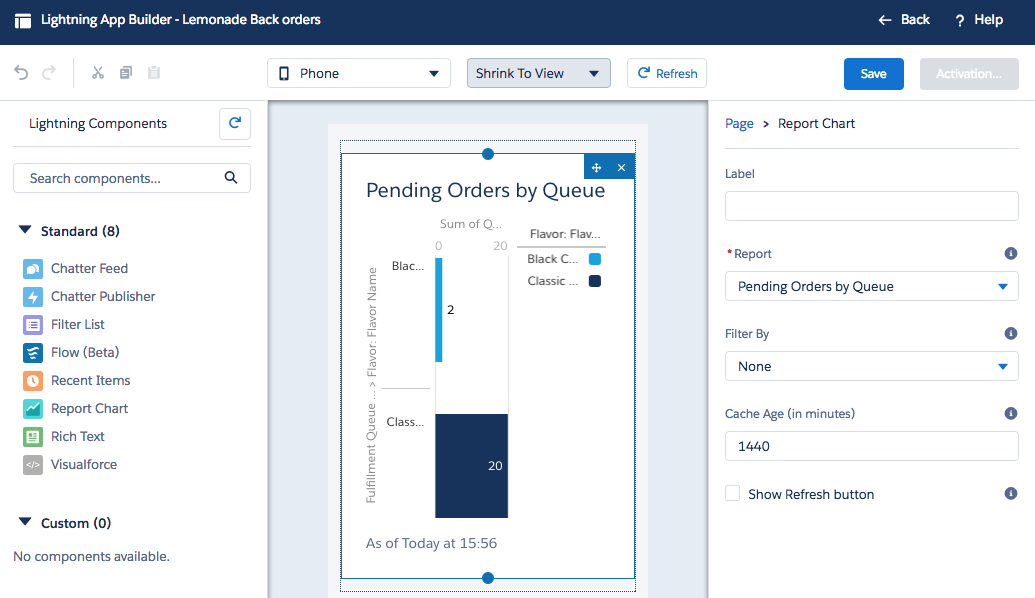
- Also drag the 'Recent Items' component on the page below the chart. Select Drink Order as object to display, remove Account and click 'OK'. Feel free to add a label before clicking 'Save'
- Click Activate and on the 'PAGE SETTINGS' tab leave the defaults. Click 'LIGHTNING EXPERIENCE' and add our page to the 'Lemonade Stand' App

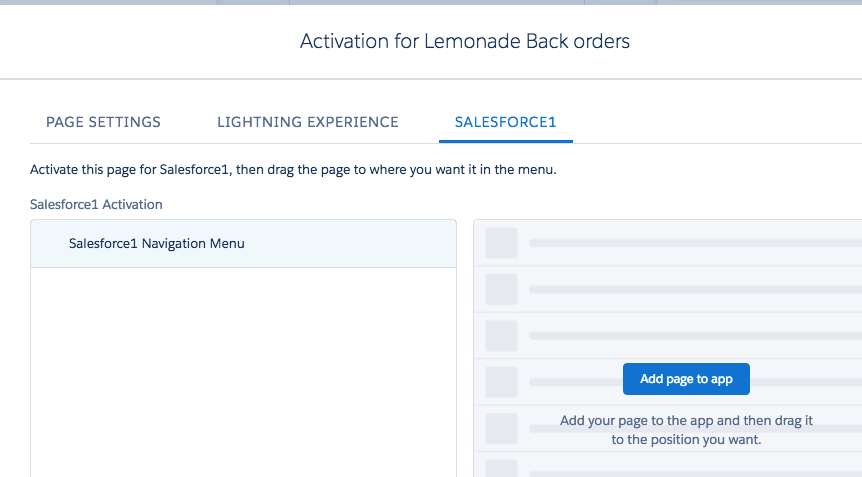
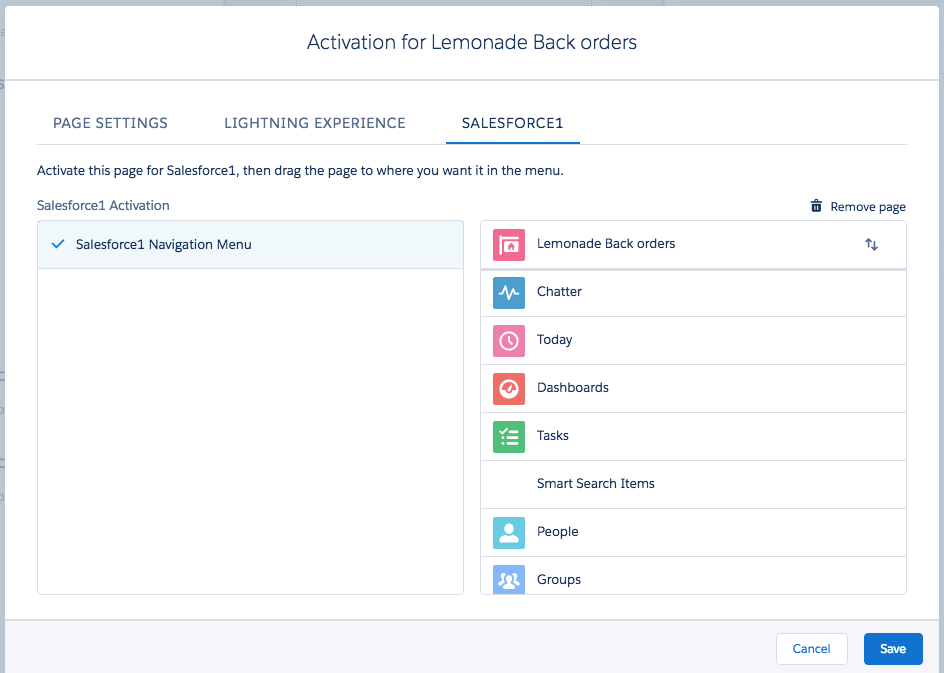
- Click 'SALESFORCE1' and click Add page to app. Drag your page to the top and click Save.
- Click Back to go back to Setup
- In Googler Chrome you can use the Developer Tools render a mobile view. Reload the page to switch to Salesforce1!
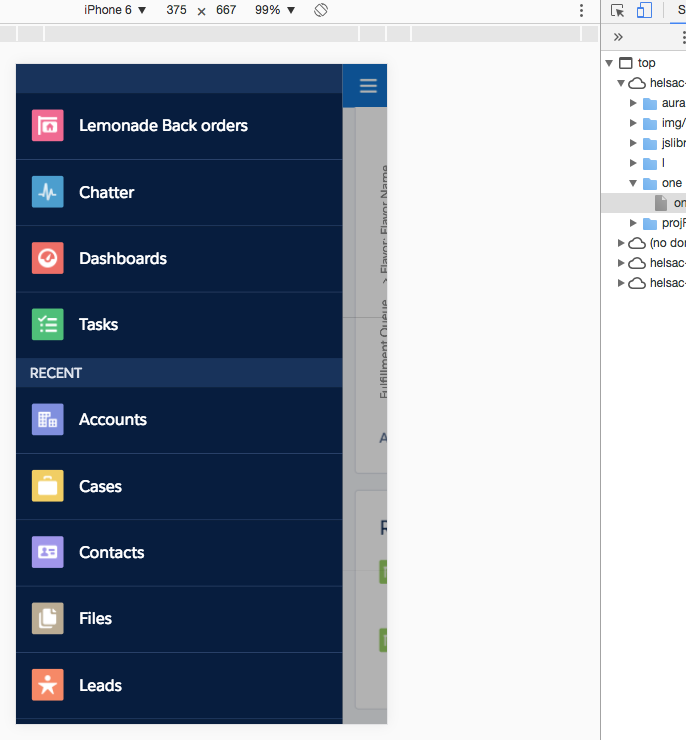
- You can off course also use the Salesfore1 app to view the content
enhancing (optional)
There's a number of additional tools available to enhance our App. You can do this through following other Trails and earn more badges. This section offers some optional content for you to follow if time permits.
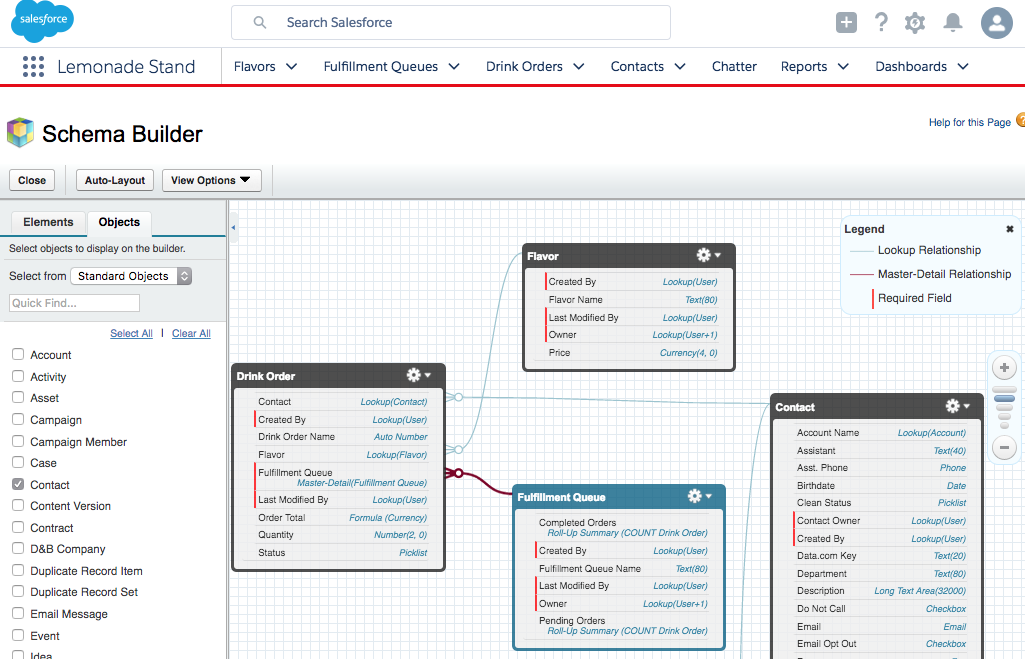
First we'll have a look at the Schema Builder, Schema Builder is a Graphical User Interface to easily see objects and relationships, and create objects and fields quickly.
- Navigate to Setup Home and search for 'Schema Builder' in the Quick Find box
- Click Schema Builder
- Select All Objects in the drop down box and click Clear All. Select Custom Objects in the drop down box and click Select All
- Select Standard Objects and select Contact. If you've built the Lemonade Stand objects your objects should have the below structure
- Click on the Elements tab
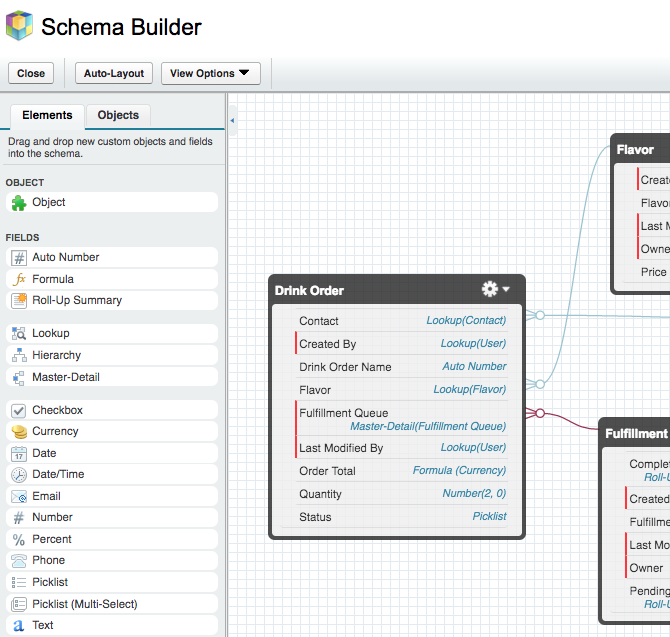
- You can now drag and drop a new Object on the canvas, edit existing objects, add or edit fields easily. Feel free to try but don't save. Close the Schema Builder
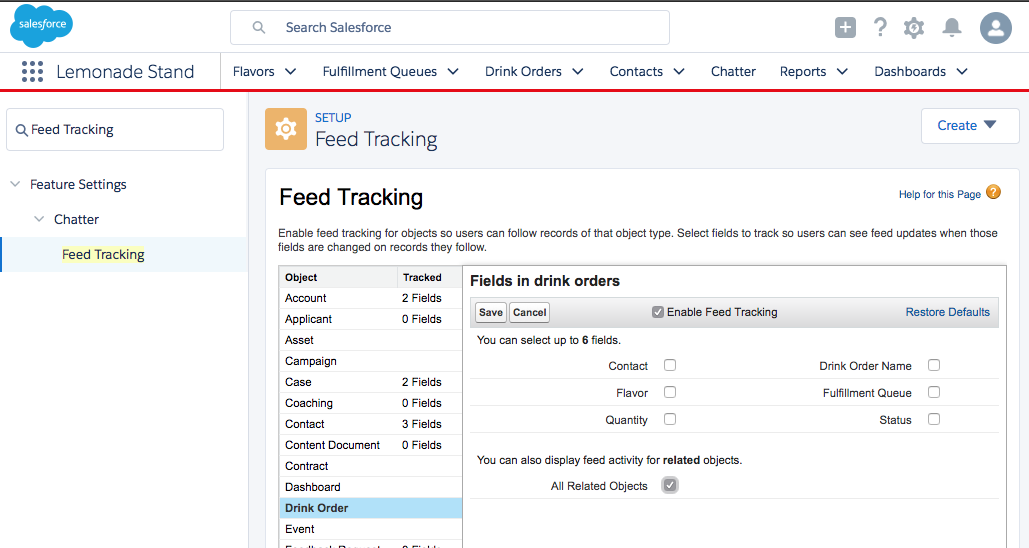
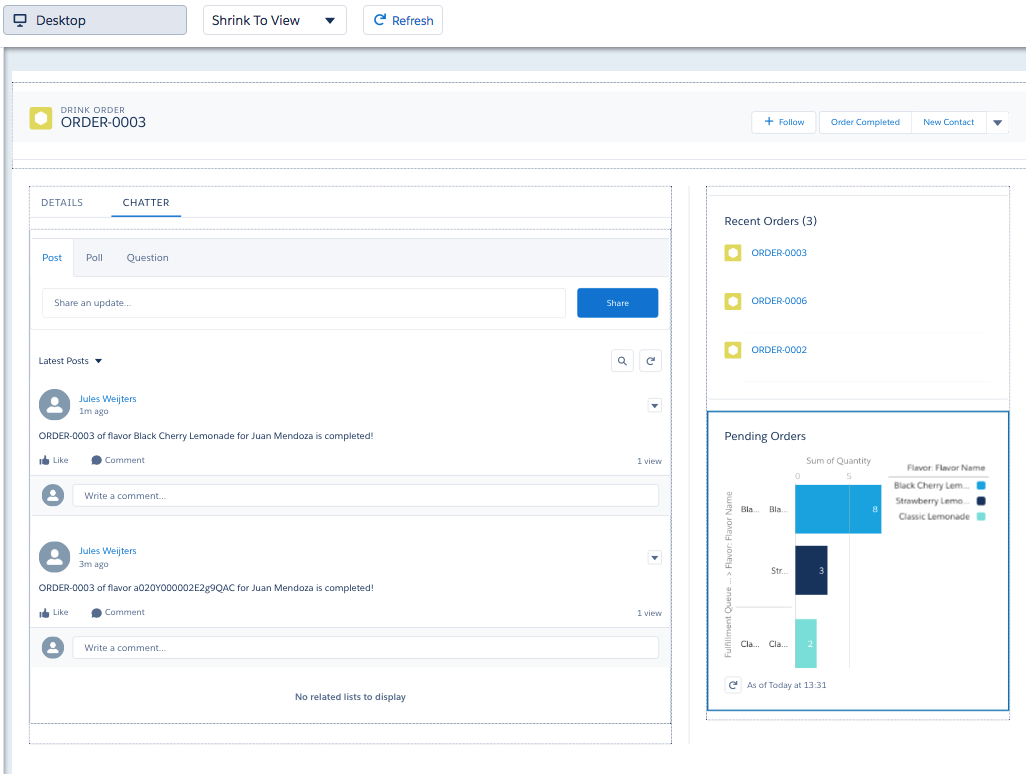
In the Lemonade Stand App customers might have some specific wishes with their order, with a Chatter post a waitress can add a comment to an Order.
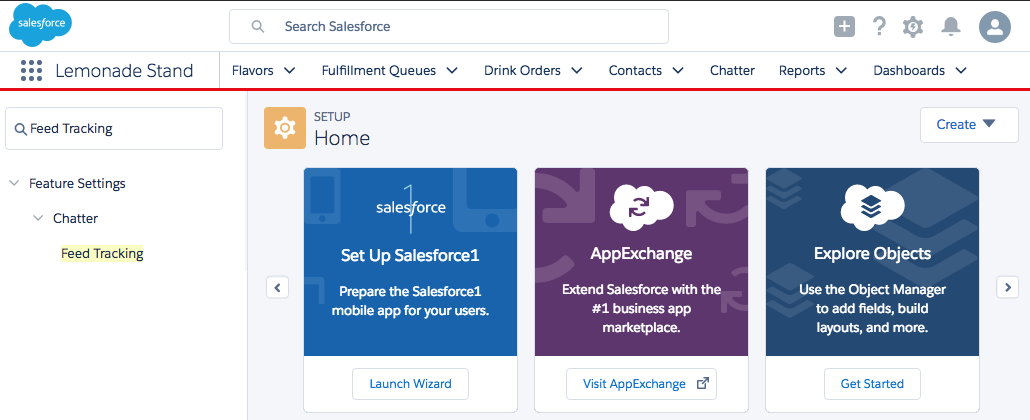
- Navigate to Setup Home and search for 'Feed Tracking' in the Quick Find box
- Select 'Drink Order' and check 'Enable Feed Tracking' and 'All Related Objects'. Click Save
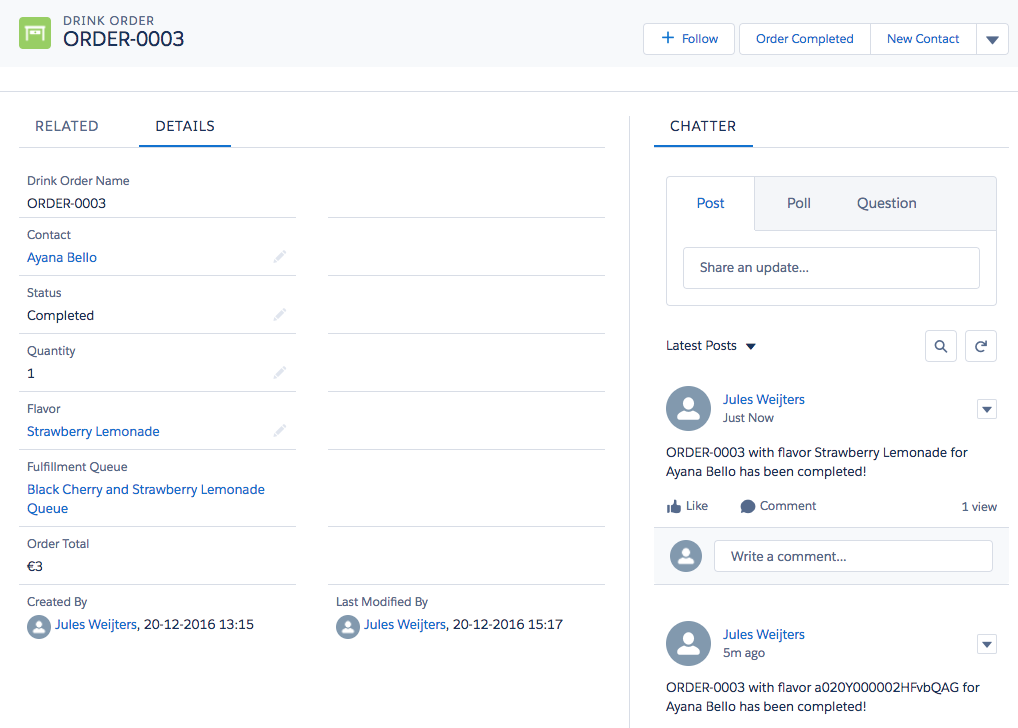
- Create a new Drink Order and notice the Chatter section has appeared
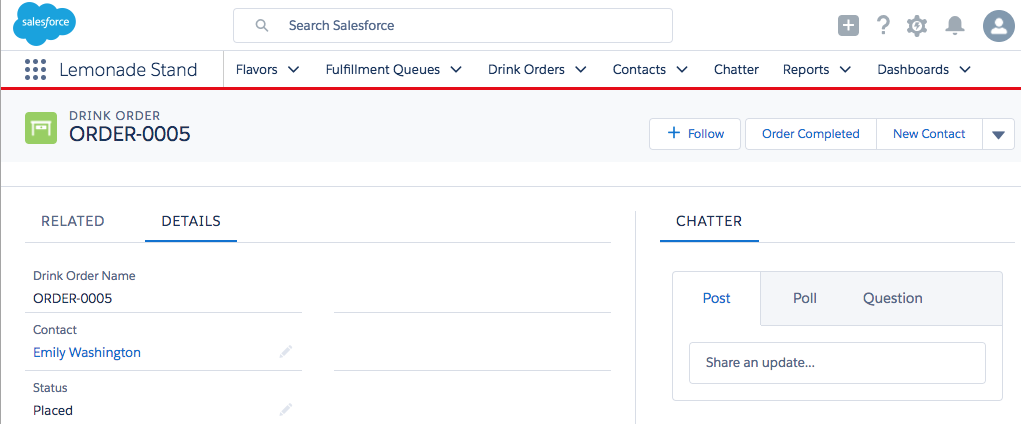
- Create a post and Share

- Off course you could have added a field for notes but select the Chatter tab
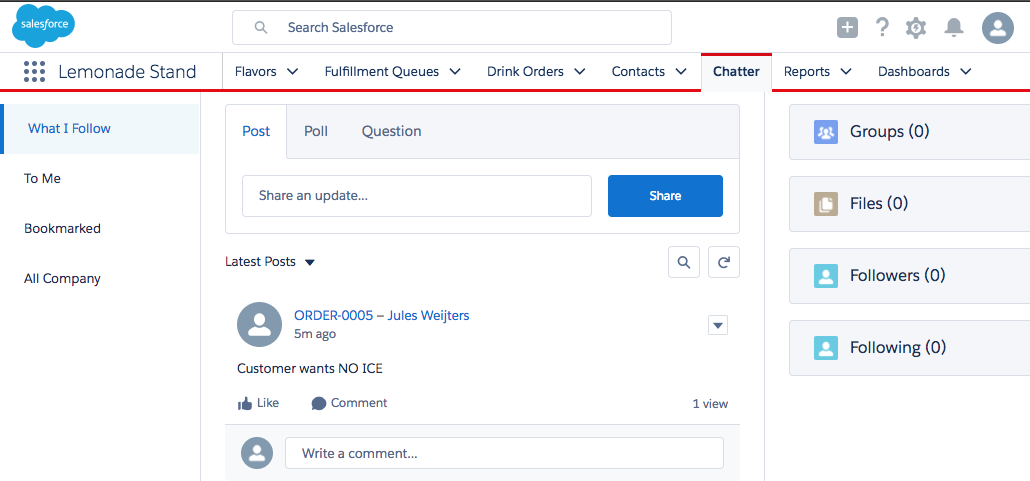
- People can follow the Drink Orders chatter feed and be alerted for special orders or comment directly on the post ('Our business is doing so well, we're out of Strawberry flavoured lemonade!')
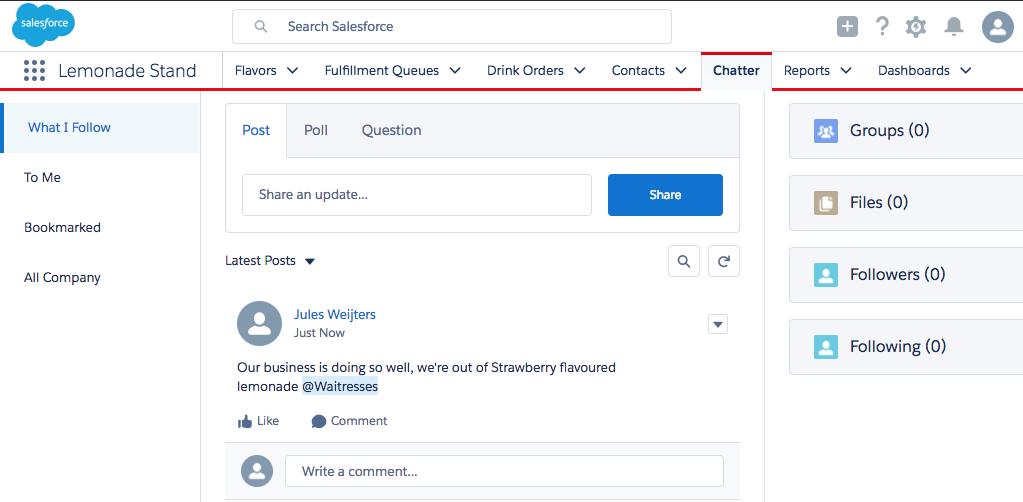
- With the @mention it's possible to direct the post at a specific Group if it exists
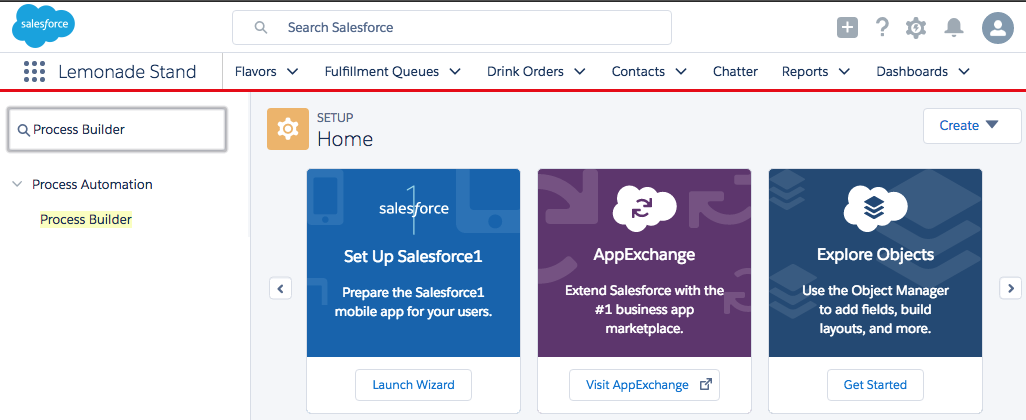
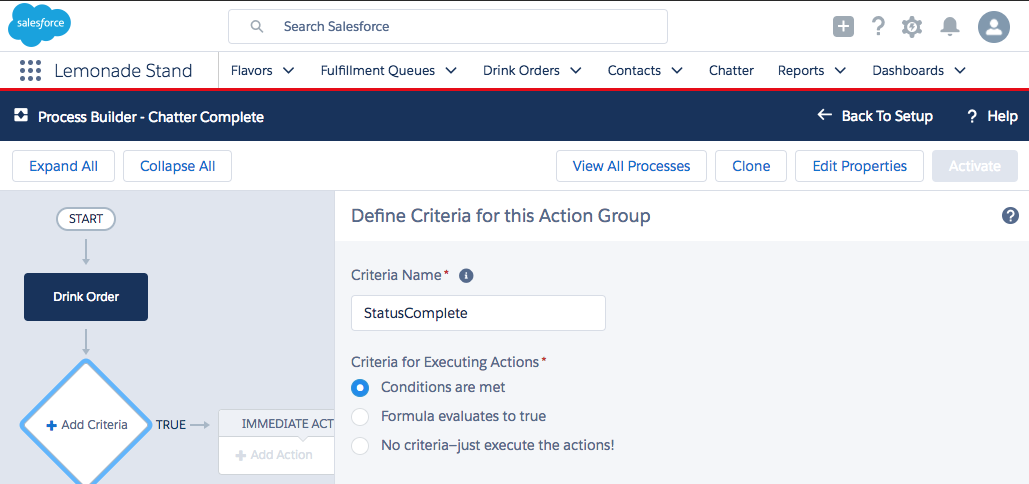
- Navigate to Setup Home and search for 'Process Builder' in the Quick Find box
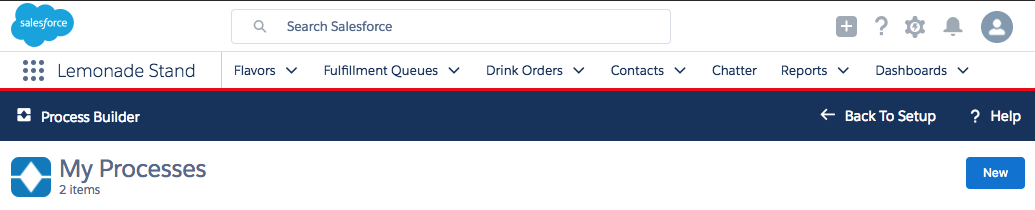
- Clicking Process Builder will open a new screen. Select New to start a new process
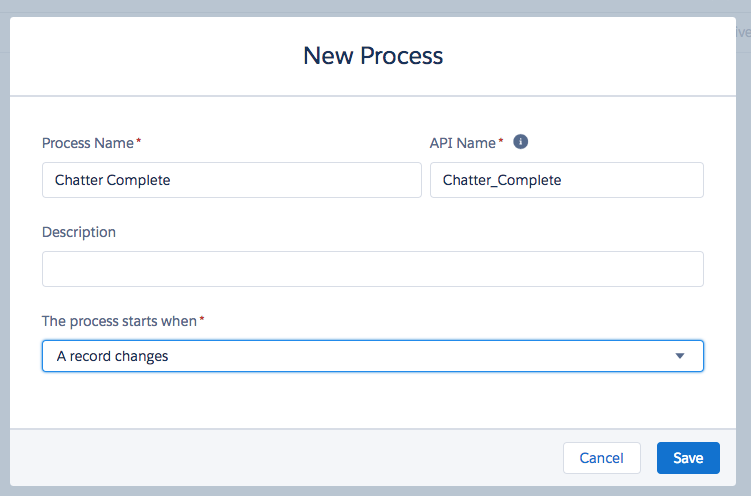
- Give the process a name and select The process starts when 'A record changes'. Click Save
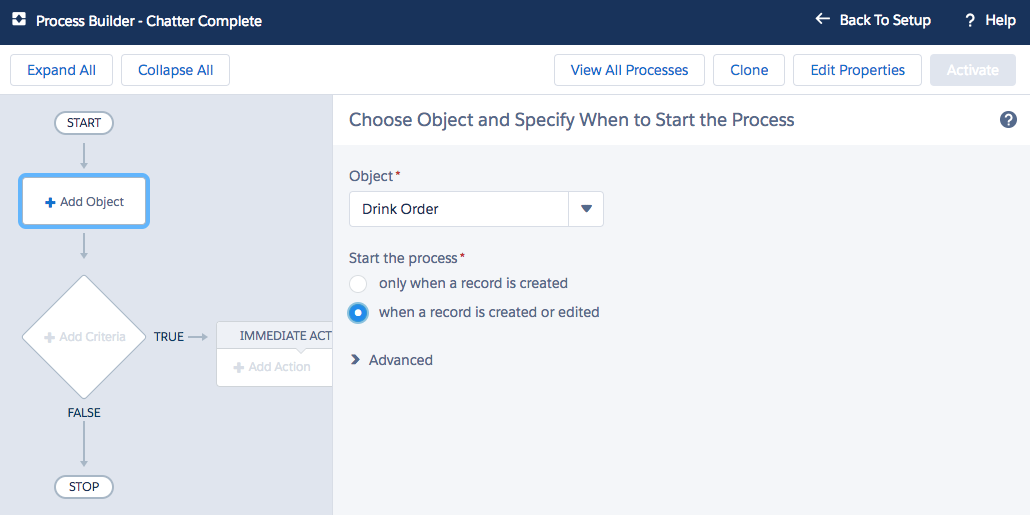
- Click + Add Object, select Drink Order and 'when a record is created or edited'. Click Save
- Click + Add Criteria and provide a name
- Select the field Drink_Order__c → Status and click Choose
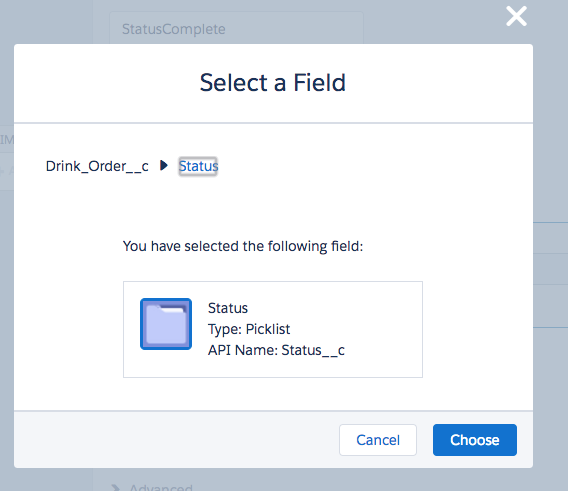
- From the Value field pick the value Completed and click Save. So we only do the action when the status is Complete.

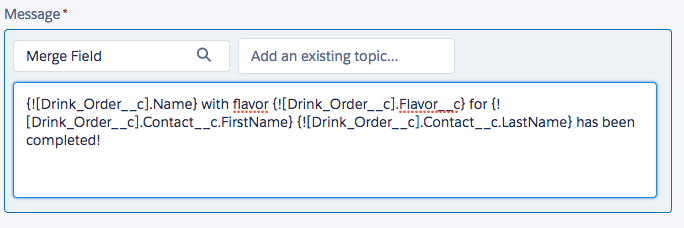
- Click + Add Action, select the 'Post to Chatter' Action Type, provide an Action Name, select 'Post to 'This Record' and built the message with Merge Fields
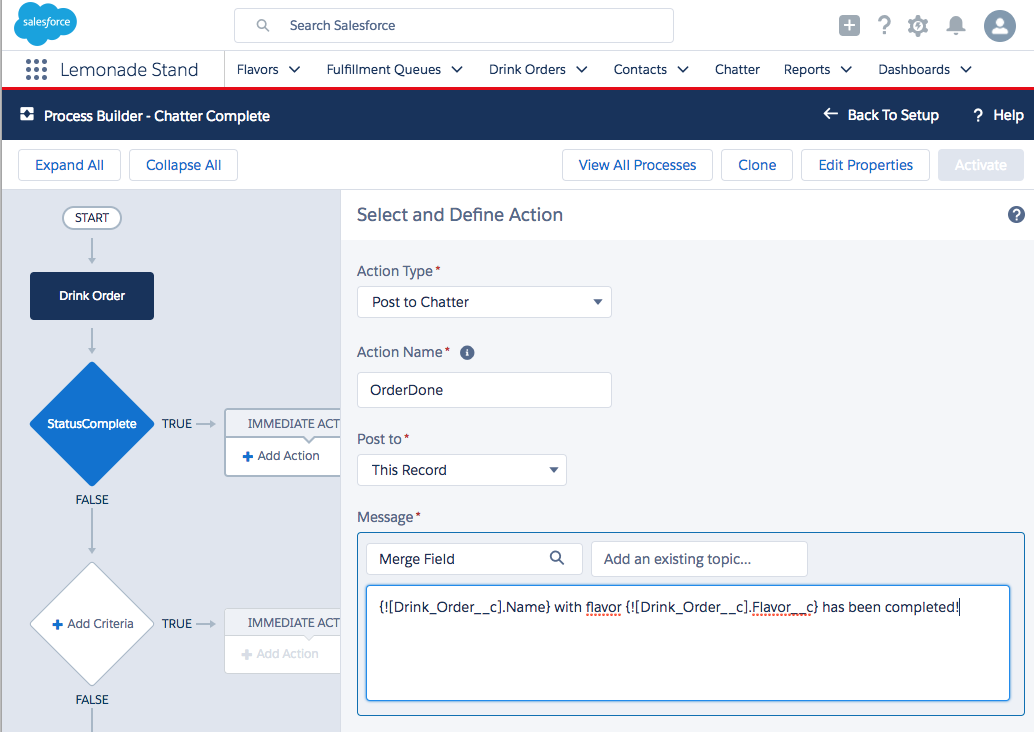
- Click Save and click Activate. Confirm and test by marking a Drink Order as complete
- If the action is not working properly go back to Process Builder. Select the process and click Clone. Once a process is active you can only change a process by creating a new version
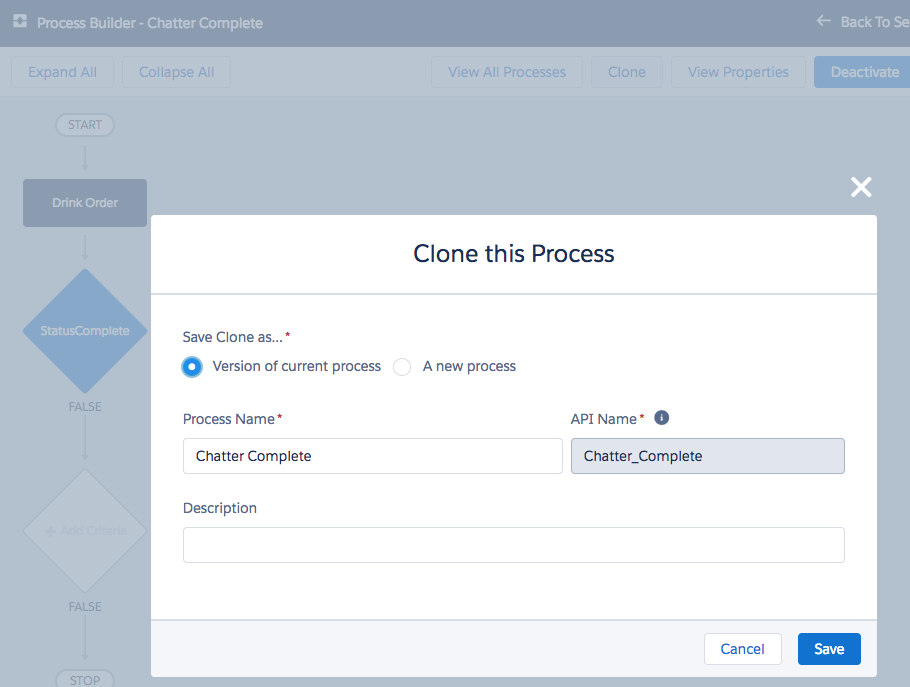
- Change the process and click Save, Activate and Confirm again. A new version will be now active

- Test your process by marking an order as complete by changing the status to 'Completed'.
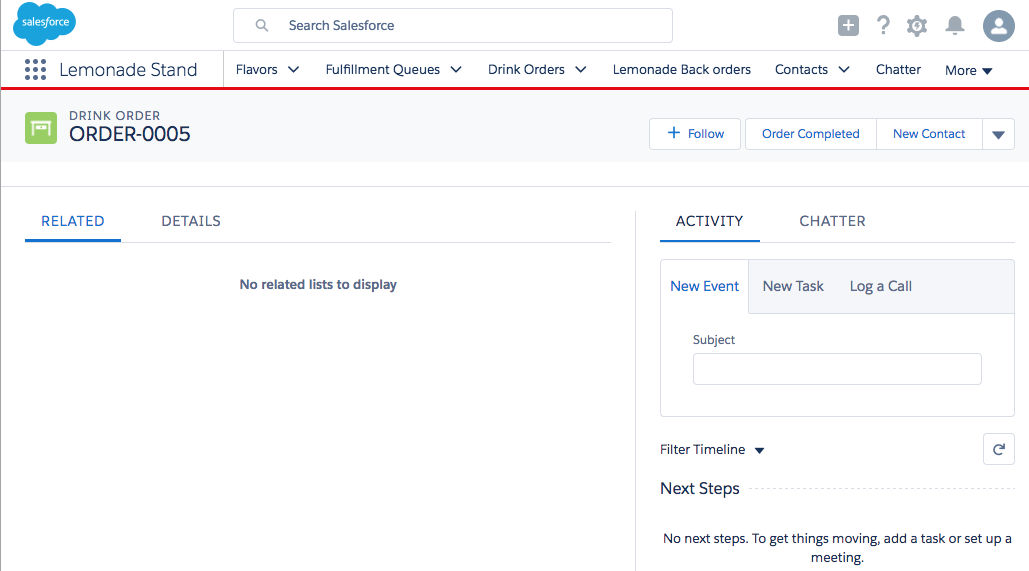
In the Lemonade Stand App we have some content on the Drink Order page which is not relevant. Like the 'Related' and the 'Activities' tab (Activities are only there when you created the Object with 'Allow Activities' enabled). Let's change the page.
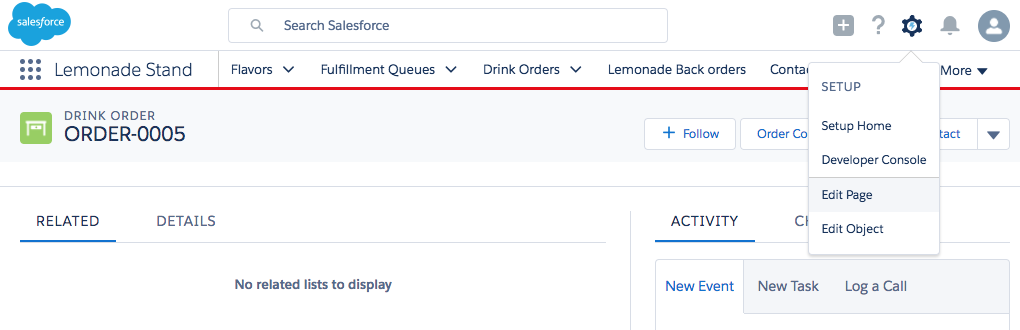
- Open a Drink Order from the Drink Orders tab. Click on 'RELATED'
- Now click on the wheel in the top right and select 'Edit Page'
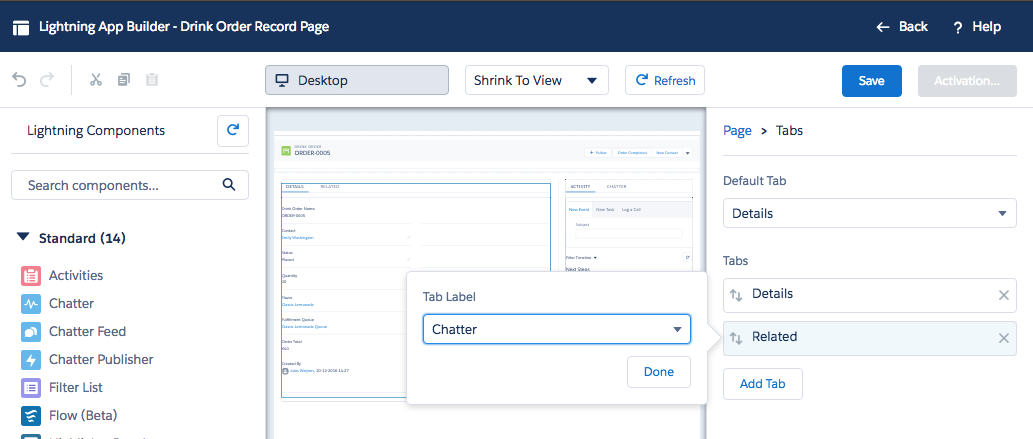
- In the Lightning App Builder select the Tabs object on the left of the page. Move 'Details' up and change 'Related' to 'Chatter'
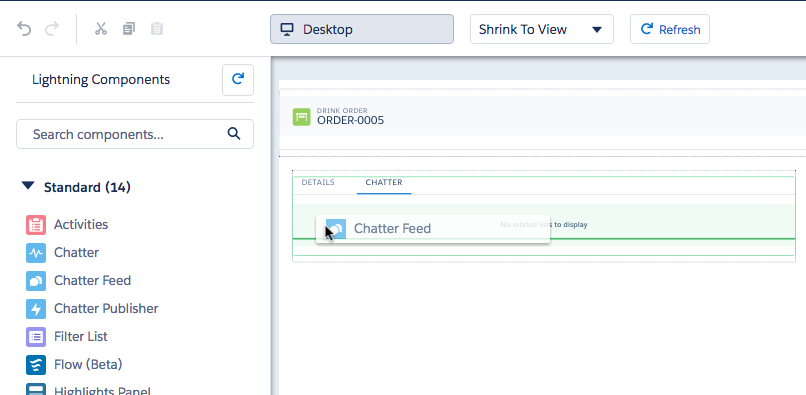
- Click on the 'CHATTER' tab in the first Tabs component and drag the 'Chatter Feed' component into the tab. feel free to also add the Chatter Publisher above the Chatter Feed component
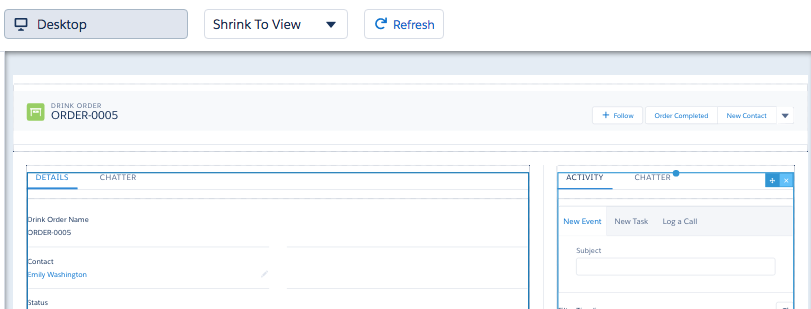
- Remove the other Tabs component through selecting the cross in the upper right corner of the Tabs component
- Feel free to try some of the other components on the free space available. Try to add Filter list that shows all available Flavors. A question waitresses must be asked regularly.
- Finally click Save and Activate. Activate the page Assigning the page as App Default for Lemonade Stand. Click Save. Click Back to go to the new Drink Order details page
Communities
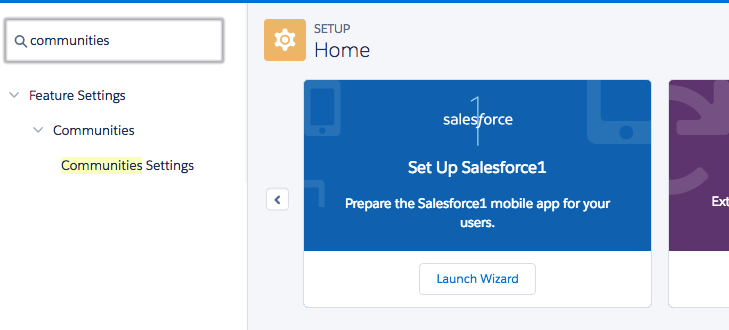
Until now all the work we did was for setting up functionality for Salesforce users, normally employees. We might also want to expose some of the data to our customers or partners and maybe also provide some self-service. This is where Communities (https://trailhead.salesforce.com/module/community_rollout_implcan) can help.
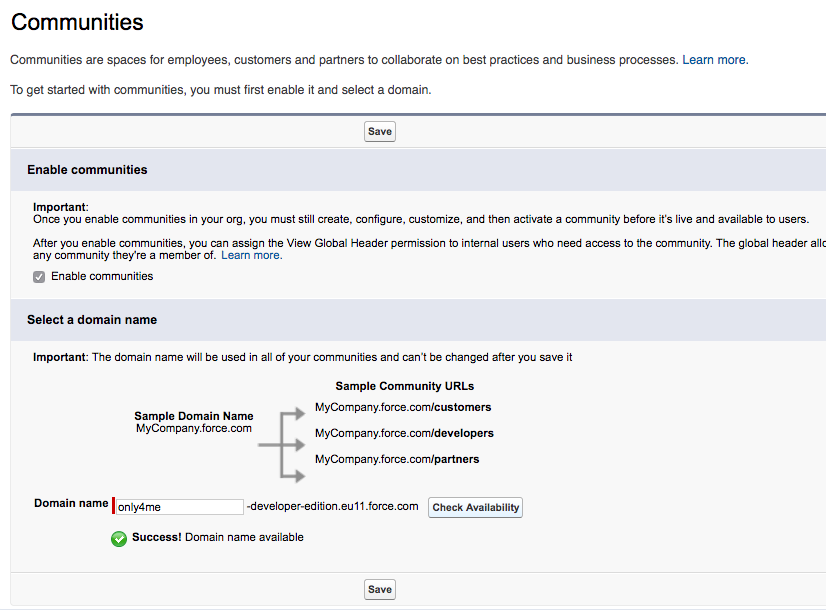
- First enable Communities in your environment. Navigate to Setup Home and search for 'Communities' in the Quick Find box. Click Communities Settings
- Check 'Enable communities'
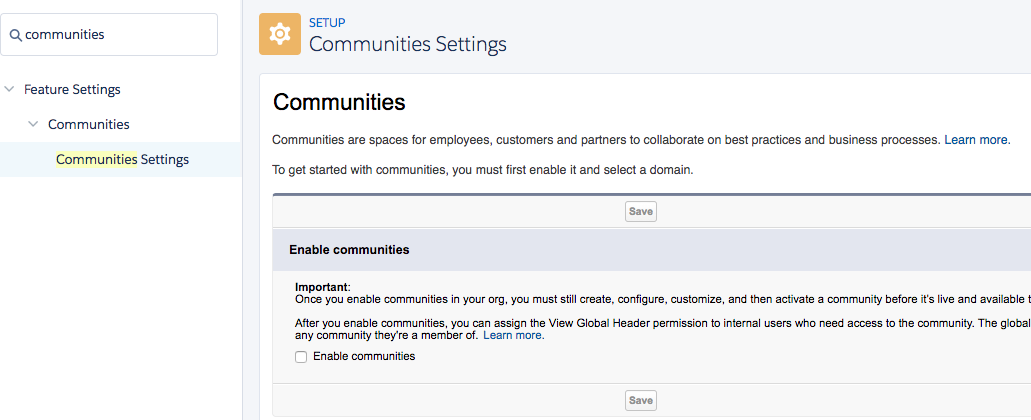
- Pick a domain name and click Check Availability. If available click Save
- If pop-ups are not blocked you'll see a new window or tab. Click New Community

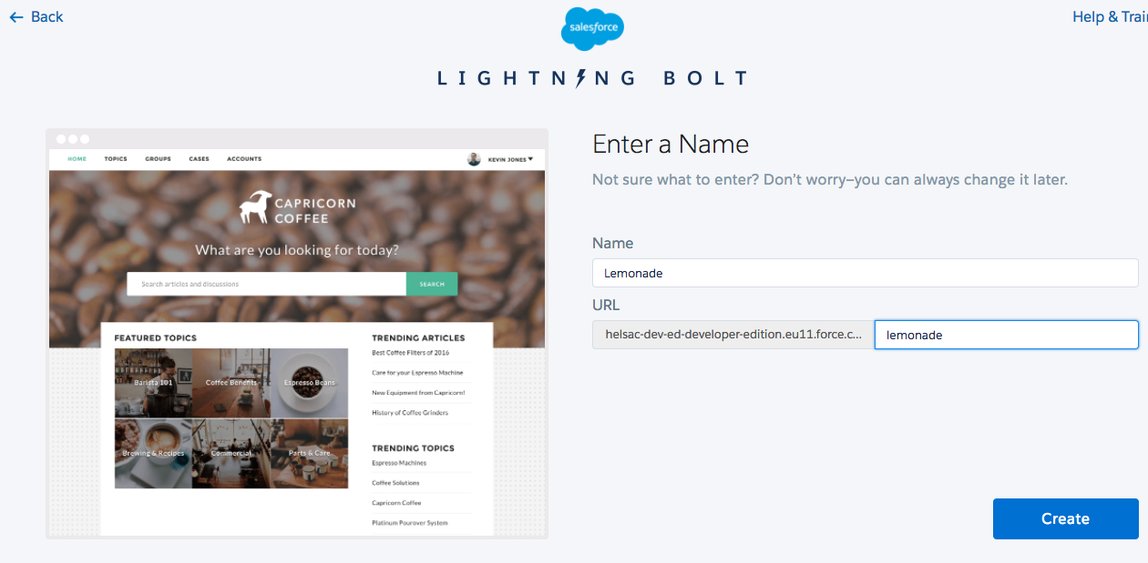
- Templates are shown, pick 'Customer Service (Napili)' and click Get Started

- Enter Lemonade for the name and the URL. Click Create
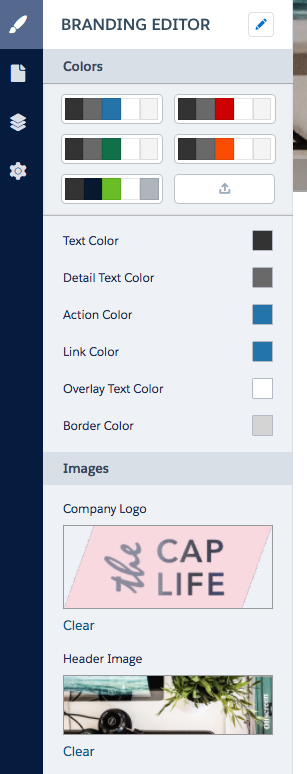
- Click Build & Customize to start the Community Builder. You can change the color scheme and add images for logo and header if you like
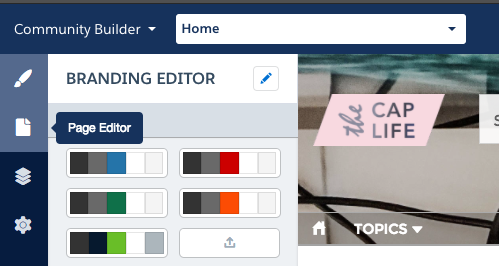
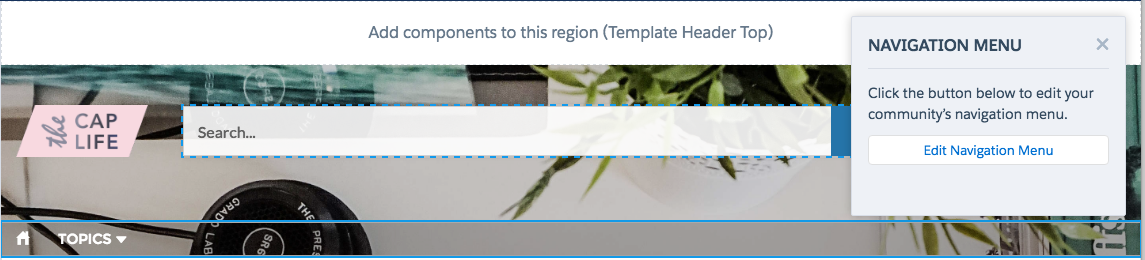
- Select the 'Page Editor' and click on 'TOPICS' to edit the NAVIGATION MENU. Click Edit Navigation Menu in the pop-up
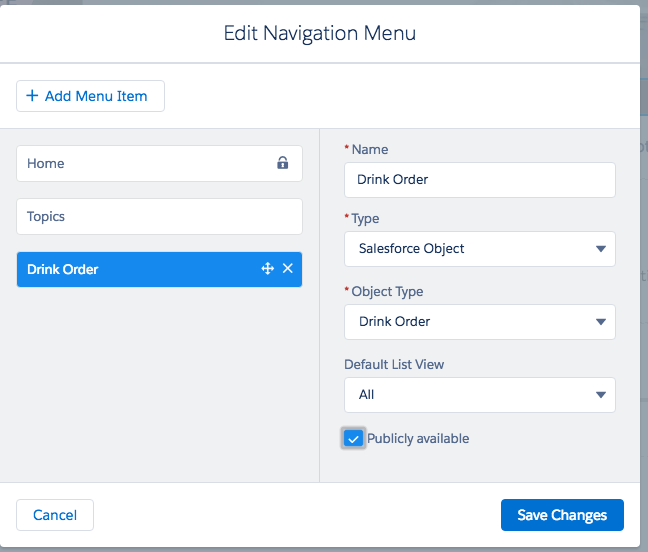
- Click + Add Menu Item and fill-out the details below. Make sure you select 'Salesforce Object' as Type and our object 'Drink Order' as Object Type. Click Save Changes
- Click Publish on the top right and Publish again. Now click Preview in the top right.
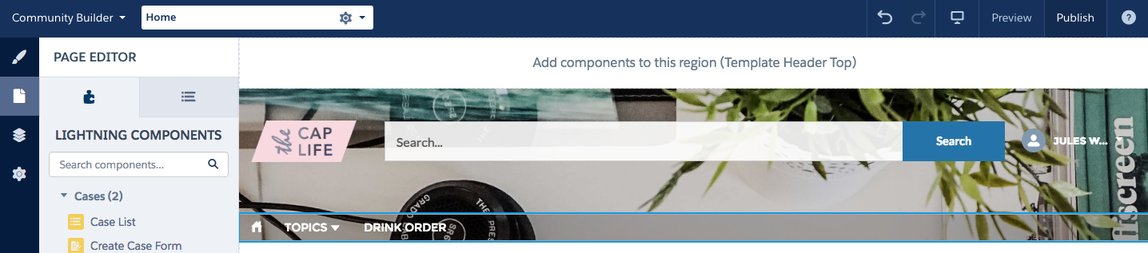
- Select Drink Orders from the menu to see your drink orders. With clicking New drink orders can even be created.
Finally
Now the small Lemonade stand business becomes part of a larger organisation. This organisation is not working with Salesforce yet but does administer orders. To have a complete account and contact insight it's required for Salesforce to look up those orders.
With Salesforce Connect you can create a data proxy to pull OData or other data sources into Salesforce on demand. No data is copied to the Salesforce database. This means in our example for orders from the external source the external system remains the primary source for the non-Lemonade orders.
Another Trailhead module, Quick Start: Salesforce Connect (https://trailhead.salesforce.com/project/quickstart-lightning-connect), quickly shows how to connect to an external datasource. If time permits you can complete the trail an get another badge.